This is a recipe that Sunitha had mentioned in her chicken cutlet post about a month ago. Which means today’s recipe has been in the drafts for quite a long time. I haven’t been cooking anything time consuming of late mainly because of laziness. But I continue to blame the weather for my lethargy !
Meat cutlets are a hot selling snack in Kerala bakeries. We have a couple of bakeries, near my parents ‘ home, where they sell the most delicious cutlets. Some days, the demand was so high the bakeries would run out of cutlets way before tea time, which is when we would have stopped by to buy some. Oh! the disappointment!
Another place and time from when cutlets got registered in my mind as a fantastic food was the hostel. Especially the one I stayed in while doing my pre-degree course. This hostel is in fact one of the best hostels where I stayed which served good food. I can say this with certainty because I have stayed in quite a few hostels during my college days. And beef cutlets in this place served was tremendous. Hm… I can almost taste it, writing about it.
Thursday lunch is when they served cutlets and Thursdays were always when the hostelites felt the hunger pangs the most. Well, hunger and a dying desire to eat the marvelous cutlets, of course. The hostel is about 5 minutes from the college campus but on Thursdays we would reach it in a minute. One cutlet per person, a dry dish with moru kachiyathu was the menu. Now, you will agree one cutlet for a person is never enough. For the first year, most of us savored every bite of this one piece we were doled out and remained sated. But the second year, we were bolder and demanding. With more friends, gangs had been formed and the human pack behavior was at it’s best. Some of us meat eaters had vegetarian friends and we plotted a plan. On Thursdays, we managed to get these poor souls to lunch at our table. I remember one girl a vegetarian by choice who sometimes enjoyed chicken but otherwise remained a vegetarian. We connived and pleaded with her to lunch at our table. She was a sweet heart and foregoing her special vegetarian food agreed to lunch with us. The lady who serve us, unaware of our antics would serve everyone at our table a cutlet each and as (The vegetarians and non vegetarians are encouraged to sit at their preferred place so that food can be served accordingly on each table). The unsuspecting served would serve this vegetarian friend a cutlet and the rest of us would hide our smile and wait for her to move on. As soon as the server was out of sight we would grab the cutlet from our friend’s plate. The ensuing fight for this one lone beef cutlet is too gory to let you in on the details. We never persuaded this friend to taste the cutlets ever , fearing she might turn over and be a fan herself. We were wicked!
But I have to tell you, the time in college and the hostels were the best times. I am still in touch with friends from that time but have lost contact with the sweet friend who let us rob her of the beef cutlet. I wonder how she is fairing without cutlets but as for me and most of my other friends we all still love cutlets! Whenever I make beef cutlets memories pour in from those days. Oh jeez! I am all nostalgic now, and I want some beef cutlets !
Ingredients:
Onions finely chopped- 1/2 cup
Ginger grated- 3 Tbsp
Garlic grated- 1 Tbsp
Garam masala- 2 tsp
Green chilies finely chopped- 4-5
Black pepper powder- 1/4 tsp
Curry leaves, chopped- 5-6leaves
Ground Beef- 1 lb
Boiled potatoes- 2
Oil- 2 Tbsp + for deep frying
Bread crumbs from 2-3 slices
Slightly beaten egg- 1
Method:
1.Heat 2 tbsp oil in a wide frying pan. Saute the onions till translucent.
2.Add the chopped green chillies, ginger and garlic and saute for a few minutes.
3.Also add the garam masala and chopped curry leaves and saute.
4.Add the ground beef and mix everything well. Add a little bit (maybe 1/4 cup) water, cover and cook till the meat is done and all the water is absorbed.
5.Mash the boiled potatoes and mix with the beef mixture.
6.Heat the oil for frying the cutlets. When it is almost ready start shaping the cutlets.
7.Make small lemon size balls out of the mixture and press between the palms and make your preferred shapes, like oval, round,heart etc.
8.Dip them in the egg and roll in the bread crumbs and deep fry till both the sides are brown.
9.Serve warm with ketchup.
Notes:
1. You could use any meat of your choice.
2.If you don't have curry leaves, add some chopped coriander leaves instead.
3.Do not keep the shaped cutlets after dipping in egg for a long time. Fry them as soon as you can.
4.If you want to shape them and store for frying after a while, do not dip them in egg or roll in crumbs, do this step just before you fry them in oil.
5.The amount and flavor of ginger gives it the authentic taste. If you are using great quality ginger, use lesser than I mentioned in the recipe.(I never get ginger that has a flavor anywhere close to the ones we get in Kerala :(
I am sending these cutlets to this month's Kerala Kitchen hosted at Spoonful of Delight
Contributor: Namitha
Showing posts with label Appetizer. Show all posts
Wednesday, May 25, 2011
Beef Cutlets
Labels:
Appetizer,
beef,
Fried snack,
Gluten-free,
Kerala,
Kerala Dishes,
Naadan,
Snacks
Monday, May 23, 2011
Lettuce Wrap
Everybody needs finger food these days. Maybe it is because it allows tasting a variety without over indulging. Small bites of different taste. I get the feeling the future generations will only be eating finger foods. Which will make sense with so many people doing desk jobs and portion control of our meals are being a requiste to keep a healthy lifestyle. Have you heard of 5 course dinners recently. No, right? Exactly my point, it's the age of finger foods. So keeping with the trend, here is something easy, fun and colorful for your next party.
You can wrap the lettuce in a host of ways. Cut each leaf into four, take the mid rib out and make cones of each part, hold it together with tooth picks and fill with your choice of meat or vegetables.
If you are just having it with your family then thin the mid rib of the leaf and wrap meat or vegetables in each romaine lettuce leaf.
Ingredients for the filling:
Chicken breast - 1 lb
Soya bean sauce - 3 Tbspn
Thail chilli - 1
Ginger - 1/4 tspn chopped or grated fine
Garlic - 2 cloves chopped fine
Sesame seeds - 1 tspn
Oil - 2 tbspn
Wrap
Romaine Lettuce - 6 leaves
Optional:
Onion - to taste
Tomato - 1/2
Method:
1. Chop the chicken breast into small pieces. Marinate with 2 tbspn of soya sauce and refrigerate overnight or at least marinate for 2 hours
2. After chicken has marinated it's ready to stir fry.
3. Heat oil in a pan, add ginger, garlic and green chilies - saute till the raw smell turns to aromatic.
4. Add the marinated chicken with juices and stir fry on high for 8 to 10 minutes or until cooked through
5. Sprinkle with sesame seeds and stir again. Alternately, toast the sesame seed and add to the cooked chicken and toss
6. Add the remaining 1 tbspn of soya sauce to the chicken towards the end of the cooking. Some soya sauce comes with a lot of salt therefore make sure you test for salt and taste before adding the last spoon of soya sauce.
7. Once the meat has cooled wrap it in a whole lettuce leaf. Or else, cut each leaf into four, make a cone shape of it and fill the chicken and hold the leaf together using tooth pick.
You can use a soya vingear dip or peanut sauce.
Contributor: Sunitha
You can wrap the lettuce in a host of ways. Cut each leaf into four, take the mid rib out and make cones of each part, hold it together with tooth picks and fill with your choice of meat or vegetables.
If you are just having it with your family then thin the mid rib of the leaf and wrap meat or vegetables in each romaine lettuce leaf.
Ingredients for the filling:
Chicken breast - 1 lb
Soya bean sauce - 3 Tbspn
Thail chilli - 1
Ginger - 1/4 tspn chopped or grated fine
Garlic - 2 cloves chopped fine
Sesame seeds - 1 tspn
Oil - 2 tbspn
Wrap
Romaine Lettuce - 6 leaves
Optional:
Onion - to taste
Tomato - 1/2
Method:
1. Chop the chicken breast into small pieces. Marinate with 2 tbspn of soya sauce and refrigerate overnight or at least marinate for 2 hours
2. After chicken has marinated it's ready to stir fry.
3. Heat oil in a pan, add ginger, garlic and green chilies - saute till the raw smell turns to aromatic.
4. Add the marinated chicken with juices and stir fry on high for 8 to 10 minutes or until cooked through
5. Sprinkle with sesame seeds and stir again. Alternately, toast the sesame seed and add to the cooked chicken and toss
6. Add the remaining 1 tbspn of soya sauce to the chicken towards the end of the cooking. Some soya sauce comes with a lot of salt therefore make sure you test for salt and taste before adding the last spoon of soya sauce.
7. Once the meat has cooled wrap it in a whole lettuce leaf. Or else, cut each leaf into four, make a cone shape of it and fill the chicken and hold the leaf together using tooth pick.
You can use a soya vingear dip or peanut sauce.
Contributor: Sunitha
Labels:
Appetizer,
Chicken,
Gluten-free,
Salad,
wraps
Tuesday, October 12, 2010
Cauliflower Bajji/Cauliflower Fritters
What would you do if it's raining continuously and the temperature is in the 40’s (F)? I would make some fritter and have it with a cup of warm tea. I am sure you have your own ways to indulge; one of mine for a cloudy day is to relax with some nice bhajjis and tea.
On a different note, my 2-year-old’s word power is developing exponentially. Yes, it’s good news and as his mother I am proud. What has me pulling my hair and worrying is wondering when he will stop embarrassing me by commanding orders. He always excludes key words like ‘please’ and “May I have” in his speech.
He does know these words, but conveniently uses them only as a last resort to win his parents over. The other day at Children's Place (I like this store for its reasonable rates and good quality) he was absolutely firm and determined to buy himself a shirt. He picked it up, stood his ground and with a resolute face (almost as if he was saying he is not taking no for an answer) said “I want this.”
Wow! I said yeah, but could we display some more respect? I just thought that in my mind and could never say that aloud because the store was definitely not the place to teach him respect. We dealt with the issue nicely, but what it reminded me of was the lack of politeness in my mother tongue ‘Malayalam.’ There are innumerable times I can remember when I would simply tell my mother exactly what my son told me. “I need this or that.” and still be polite but in English without those words it comes out so badly. It was another occasion to experience what my mother would rant all the time “You will know when you have your own child” and I shout out to her now - "Yes, Amma! Yes!" I am learning humility and patience at the hands of my 2-year-old.
Now you must be wondering what's the red patch on the side
It's my little imp, Mil, who couldn't stop picking a few fritters, while mommy was busy clicking away before the rain came down. Poured.
Yes, the yellow fritters at the back which my son is giving all the attention to is plantain fritters/pazham pori. You can find the recipe here.
Ingredients:
Cauliflower Florets- 2 cups
Gram Flour/Besan- 1/2 cup
Rice Flour- 1/4 cup
Salt- To taste
Chilli powder- 1 tsp or more
Ajwain- 1/2 tsp
Turmeric powder- a pinch
Oil- for frying
Method:
1.Steam cook the cauliflower florets.(do not overcook)
2.Mix all the other ingerdients together and add enough water to make a batter that has the consistency of idli batter.
3.Heat oil for frying in a deep pan.
4.Throw in the cooked cauliflower in the batter and mix them so that they are coated well with the batter.
5.When the oil is hot enough ( if you drop a dash of batter it should splutter) slowly slide in the florets in the batter,one at a time and fry till they are golden brown.(turn the sides in between)
6.Drain them on a paper towel.Enjoy with a cuppa.
Notes:
1.If you do not have ajwain add a pinch of asafoetida,instead.
2.I have tried these florets without cooking the cauliflower in advance, but then I will cut the florets thin.
3.Keep the heat on medium to medium high.
Contributor: Namitha
Labels:
Appetizer,
Cauliflower,
Gluten-free,
Snacks,
Starters
Friday, October 8, 2010
Italian Breadsticks/Grissini
We have been talking a lot about fall and 'IT' is here! We hope all of you living in America are enjoying the beautiful fall colors, and the cool weather. The leaves look so pretty, but the wind is blowing them off so quickly that I hate it. Soon the trees will be all bare, and the snow will cover them. I don't even want to think about that right now. For the time being, let's talk about warm, toasty Italian bread sticks.
The Italian bread sticks (aka Grissini) originated in Turin, Italy according to Wikipedia. They are usually served as an appetizer in restaurants. I don't mind them having any time , either as a snack, or with a cup of coffee.
I didn't have the patience to make them into perfect ropes, but they still look pretty !

They could be served as an appetizer with a soup of your choice or enjoy them with a cuppa/ as it is :-)

Here is a glimpse from my kitchen.Hope this gives you an idea about rolling, cutting and making the sticks !

Ingredients:
All purpose Flour- 2 to 21/4 cups
Salt- 11/2 tsp
Olive oil- 2 Tbsp
Active Dry yeast- 2 1/4 tsp/one packet
Sugar- 1 Tbsp(divided)
Mixed dried Herbs(I used a mixture of oregano, marjarom, basil and parsley)- 2 tsp
Milk- 1/2 cup + 1 Tbsp for brushing
Warm water- 1/4 cup
Method:
1.Mix half of the sugar and yeast in the warm water and let it sit for a couple of minutes.
2.In a large mixing bowl, combine flour(start with 2 cups),salt,rest of the sugar,dried herbs and olive oil.
3.Make a well in the middle and add the milk and the yeast mixture.Mix everything well.
4.Knead the dough for a few minutes using your stand mixer or hands.Add more flour,if necessary to make a smooth dough.
5.After kneading for another 4-5 minutes, shape the dough into a ball,cover and keep it for an hour in a warm place so that it will double in size.
6.After the dough becomes double,divide the dough into 4 equal parts.
7.Preheat the oven at 425 degree F. Prepare a baking sheet lined with parchment paper that is slightly greased.
8.Roll out each part of the dough into a 12 inch long and 4-5 inch wide rectangle.
9.Divide this rectangle into 4 equal parts and roll up it lengthwise to make a stick.
10.Keep it on the greased parchment paper and let sit covered for 10-15 minutes. Brush with milk or with slightly beaten egg.
11.Bake for about 15 minutes or until it starts turning golden brown.
12.Cool on a wire rack and enjoy with a cuppa.

Notes:
1.Instead of adding the dried herbs in the dough, you could use them to make a topping for this bread sticks.After brushing with milk just sprinkle them on top.
2.You could also use sesame seeds to sprinkle on top.
3.The egg wash gives a nicer and better color for the bread sticks, but I prefer to use milk/oil.
4.This makes 16 bread sticks.
Inspired by: Home made breads by Better Homes and Gardens, 1960 edition
Contributor: Namitha
The Italian bread sticks (aka Grissini) originated in Turin, Italy according to Wikipedia. They are usually served as an appetizer in restaurants. I don't mind them having any time , either as a snack, or with a cup of coffee.
I didn't have the patience to make them into perfect ropes, but they still look pretty !
They could be served as an appetizer with a soup of your choice or enjoy them with a cuppa/ as it is :-)
Here is a glimpse from my kitchen.Hope this gives you an idea about rolling, cutting and making the sticks !
Ingredients:
All purpose Flour- 2 to 21/4 cups
Salt- 11/2 tsp
Olive oil- 2 Tbsp
Active Dry yeast- 2 1/4 tsp/one packet
Sugar- 1 Tbsp(divided)
Mixed dried Herbs(I used a mixture of oregano, marjarom, basil and parsley)- 2 tsp
Milk- 1/2 cup + 1 Tbsp for brushing
Warm water- 1/4 cup
Method:
1.Mix half of the sugar and yeast in the warm water and let it sit for a couple of minutes.
2.In a large mixing bowl, combine flour(start with 2 cups),salt,rest of the sugar,dried herbs and olive oil.
3.Make a well in the middle and add the milk and the yeast mixture.Mix everything well.
4.Knead the dough for a few minutes using your stand mixer or hands.Add more flour,if necessary to make a smooth dough.
5.After kneading for another 4-5 minutes, shape the dough into a ball,cover and keep it for an hour in a warm place so that it will double in size.
6.After the dough becomes double,divide the dough into 4 equal parts.
7.Preheat the oven at 425 degree F. Prepare a baking sheet lined with parchment paper that is slightly greased.
8.Roll out each part of the dough into a 12 inch long and 4-5 inch wide rectangle.
9.Divide this rectangle into 4 equal parts and roll up it lengthwise to make a stick.
10.Keep it on the greased parchment paper and let sit covered for 10-15 minutes. Brush with milk or with slightly beaten egg.
11.Bake for about 15 minutes or until it starts turning golden brown.
12.Cool on a wire rack and enjoy with a cuppa.
Notes:
1.Instead of adding the dried herbs in the dough, you could use them to make a topping for this bread sticks.After brushing with milk just sprinkle them on top.
2.You could also use sesame seeds to sprinkle on top.
3.The egg wash gives a nicer and better color for the bread sticks, but I prefer to use milk/oil.
4.This makes 16 bread sticks.
Inspired by: Home made breads by Better Homes and Gardens, 1960 edition
Contributor: Namitha
Tuesday, September 7, 2010
Garlic Mozarella Bread
So howz it going?
Sun shiny weather with cool breeze, it's delicious. Hope you are enjoying yourself as much as I.
Talking about today's cooking; on my regular grocery shopping this weekend I decided to bring home one of these long French Breads. Do you like the way they are displayed in the store. I love it. They are displayed outside the bakery section in large baskets or tubs with the bread sticking out like dry stick arrangement as in decor. Quite fancy, I would say. However, the size which is so appealing to look at puts me off from buying since it's too much for two people. This weekend though I had a case of 'butter knees'. Yeah! they gave way and the next thing I know I had grabbed one and dumped it in the cart. I did not even look at Vi to see if he approved. I walked on. He is very sweet never disapproves ;) but I knew it was a risky choice. Nobody approves wasted food in my house.
Now that I am home and my knees are back to its bony self and quite sturdy I am quite at loss to what to do with all the bread. I have decided to tackle it slice by slice. Therefore, here is a simple, quick and smart recipe for a snack which can also be a nice accompaniment with soups or salads. A no brainer!

You will need:
French Bread - 1/2 inch thick slices 8
Cheese - Mozarella
Parmesan, Asiago and Romano - I have a box with the three mixed which I use for topping salads and soups so you could just use Parmesan or any other cheese you like or simply do with only mozarella
Oregano - to taste
Garlic - 2 cloves chopped fine and gently crushed
Butter - gobs of it

Method:
1. Slather butter on both sides of the slices and set on a baking sheet
2. Sprinkle oregano and garlic equally on all pieces
3. Spoon over cheese of your taste or liking
4. Top them all with mozarella. I like to add quite a bit to make it nice and cheesy.
5. Bake in a pre heated oven at 400 D F for 6 to 7 minutes or until cheese has melted and turns a golden brown.
Contributor: Sunitha
Sun shiny weather with cool breeze, it's delicious. Hope you are enjoying yourself as much as I.
Talking about today's cooking; on my regular grocery shopping this weekend I decided to bring home one of these long French Breads. Do you like the way they are displayed in the store. I love it. They are displayed outside the bakery section in large baskets or tubs with the bread sticking out like dry stick arrangement as in decor. Quite fancy, I would say. However, the size which is so appealing to look at puts me off from buying since it's too much for two people. This weekend though I had a case of 'butter knees'. Yeah! they gave way and the next thing I know I had grabbed one and dumped it in the cart. I did not even look at Vi to see if he approved. I walked on. He is very sweet never disapproves ;) but I knew it was a risky choice. Nobody approves wasted food in my house.
Now that I am home and my knees are back to its bony self and quite sturdy I am quite at loss to what to do with all the bread. I have decided to tackle it slice by slice. Therefore, here is a simple, quick and smart recipe for a snack which can also be a nice accompaniment with soups or salads. A no brainer!
You will need:
French Bread - 1/2 inch thick slices 8
Cheese - Mozarella
Parmesan, Asiago and Romano - I have a box with the three mixed which I use for topping salads and soups so you could just use Parmesan or any other cheese you like or simply do with only mozarella
Oregano - to taste
Garlic - 2 cloves chopped fine and gently crushed
Butter - gobs of it
Method:
1. Slather butter on both sides of the slices and set on a baking sheet
2. Sprinkle oregano and garlic equally on all pieces
3. Spoon over cheese of your taste or liking
4. Top them all with mozarella. I like to add quite a bit to make it nice and cheesy.
5. Bake in a pre heated oven at 400 D F for 6 to 7 minutes or until cheese has melted and turns a golden brown.
Contributor: Sunitha
Labels:
Appetizer,
Baked Snacks,
Bread,
Easy Peasy,
Starters
Friday, August 27, 2010
Patties
How are you doing this morning. It's finally the weekend and I am sure you are feeling as good as me. I am dying to get out and walk in the woods somewhere. Yes, as soon as we have had this visit I will scour the internet to find somewhere nice to take off on a day excursion tomorrow. Guess what I have to make a neat sandwich? Culmination of English and Indian you could say. Kabab like patties. I say that because I sneaked some 'Shan Kabab masala into the ground beef I had together with some more ingredients and popped in the oven. Oh, boy! never did a spur of the moment idea turn out so well. Tasted like kababs though the texture was not as good because I refused to grind the meat fine in my mixer. However, if you do have a way of grinding fresh meat at home do that with the recipe that follows and you will be making some delicious kababs at home.
It's tart and hot and will go into a wrap or sandwich bread and make a pretty good lunch.

Ingredients:
Ground Meat - 1/2 lb
Onions - 1 small finely chopped
Ginger garlic paste - 1/2 tbspn
Salt - 1/2 tspn
Lemon juice - a squeeze ( I am thinking about 1 tspn) Please be careful how much you add because the quantity of meat is very little. Also, if you are using ginger garlic paste its already salted and had a sour taste.
Mint Leaves - 3 sprigs (take out only the leaves and chop fine)
Green chilies - 3 finely chopped or 2 well ground
Shan kabab masala - 1 tspn
paparika - a dash
pepper - a dash

Method:
1. Mix all the ingredients together. (Use a glove if you do not like to work with fresh meat)
2. Make small patties, as thin as you can with the palm of your hand and place it on an oven proof tray
4. Bake at 400 D for 20 minutes. Turn the patties with a spatula after 10 minutes and brush the juices the meat express back on.
Enjoy it as is or sandwiched between bread or crumbled into a wrap with your favorite salad dressing.
Contributor: Sunitha
It's tart and hot and will go into a wrap or sandwich bread and make a pretty good lunch.
Ingredients:
Ground Meat - 1/2 lb
Onions - 1 small finely chopped
Ginger garlic paste - 1/2 tbspn
Salt - 1/2 tspn
Lemon juice - a squeeze ( I am thinking about 1 tspn) Please be careful how much you add because the quantity of meat is very little. Also, if you are using ginger garlic paste its already salted and had a sour taste.
Mint Leaves - 3 sprigs (take out only the leaves and chop fine)
Green chilies - 3 finely chopped or 2 well ground
Shan kabab masala - 1 tspn
paparika - a dash
pepper - a dash
Method:
1. Mix all the ingredients together. (Use a glove if you do not like to work with fresh meat)
2. Make small patties, as thin as you can with the palm of your hand and place it on an oven proof tray
4. Bake at 400 D for 20 minutes. Turn the patties with a spatula after 10 minutes and brush the juices the meat express back on.
Enjoy it as is or sandwiched between bread or crumbled into a wrap with your favorite salad dressing.
Contributor: Sunitha
Labels:
Appetizer,
Baked Snacks,
beef,
Easy Peasy,
Meat,
Starters
Monday, July 19, 2010
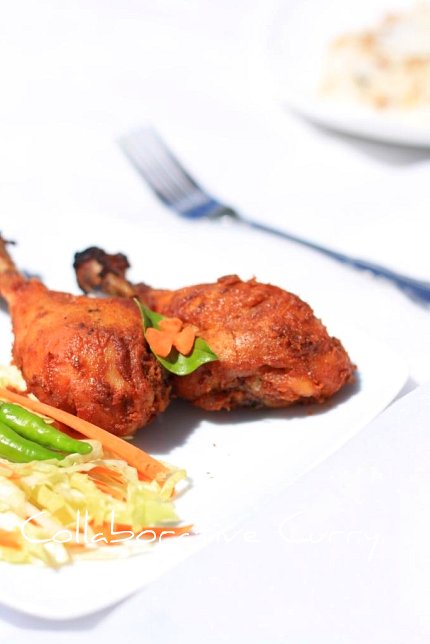
Tandoori Chicken
Thanks for all your wishes to Sunitha and me.Thanks for your understanding and continued support.
Today's dish is so popular that it doesn't need any introduction.My family just love this and we make it quite often.Usually I do not add any food color,rather I would add more Kashmiri chilli powder for the color.See you all with another delicacy, soon :-)

Ingredients:
Chicken Drumsticks- 6-7
Yogurt- 4-5 Tbsp
Ginger-Garlic Paste- 1 Tbsp
Lemon Juice- 1 tsp
Pepper powder- 1/4 tsp
Red chilli powder- 1/2 Tbsp
Kashmiri chilli powder-1 Tbsp
Garam Masala- 1/2 tsp
Coriander powder- 1 Tbsp
Turmeric- a pinch
Red food color (optional)- a few drops
Salt- To taste
Oil- 1 Tbsp

Method:
1.Clean the drumsticks and remove all the water by placing them on paper towels.
2.Prepare the marinade by mixing together all the ingredients except the oil, listed.If you have time it would be great if you could take out all the water from yogurt by letting it hang in a muslin cloth for some time.
3.Make some incisions on the drumsticks and apply the marinade on each of them.
4.Finally sprinkle the oil on top and cover it, keep in the refrigerator for overnight or at least 8 hours.
5.Preheat the oven at 450 degree F.Place an Aluminum foil on a baking tray. (this would help reduce the mess).Place the drumsticks a few inches apart and spray with some oil.
6.Bake for about 30 minutes ,turning the sides in between.
7.If your oven has broil option keep it at 500 degree F, broil for 10 minutes,again turning the sides in between.If you are not broiling, keep it at 450 for another 10-12 minutes or until it is done.
8.If you have a grill, keep it on high until the chicken is done.This takes about 20-25 minutes.
Contributor: Namitha
Today's dish is so popular that it doesn't need any introduction.My family just love this and we make it quite often.Usually I do not add any food color,rather I would add more Kashmiri chilli powder for the color.See you all with another delicacy, soon :-)
Ingredients:
Chicken Drumsticks- 6-7
Yogurt- 4-5 Tbsp
Ginger-Garlic Paste- 1 Tbsp
Lemon Juice- 1 tsp
Pepper powder- 1/4 tsp
Red chilli powder- 1/2 Tbsp
Kashmiri chilli powder-1 Tbsp
Garam Masala- 1/2 tsp
Coriander powder- 1 Tbsp
Turmeric- a pinch
Red food color (optional)- a few drops
Salt- To taste
Oil- 1 Tbsp
Method:
1.Clean the drumsticks and remove all the water by placing them on paper towels.
2.Prepare the marinade by mixing together all the ingredients except the oil, listed.If you have time it would be great if you could take out all the water from yogurt by letting it hang in a muslin cloth for some time.
3.Make some incisions on the drumsticks and apply the marinade on each of them.
4.Finally sprinkle the oil on top and cover it, keep in the refrigerator for overnight or at least 8 hours.
5.Preheat the oven at 450 degree F.Place an Aluminum foil on a baking tray. (this would help reduce the mess).Place the drumsticks a few inches apart and spray with some oil.
6.Bake for about 30 minutes ,turning the sides in between.
7.If your oven has broil option keep it at 500 degree F, broil for 10 minutes,again turning the sides in between.If you are not broiling, keep it at 450 for another 10-12 minutes or until it is done.
8.If you have a grill, keep it on high until the chicken is done.This takes about 20-25 minutes.
Contributor: Namitha
Monday, March 15, 2010
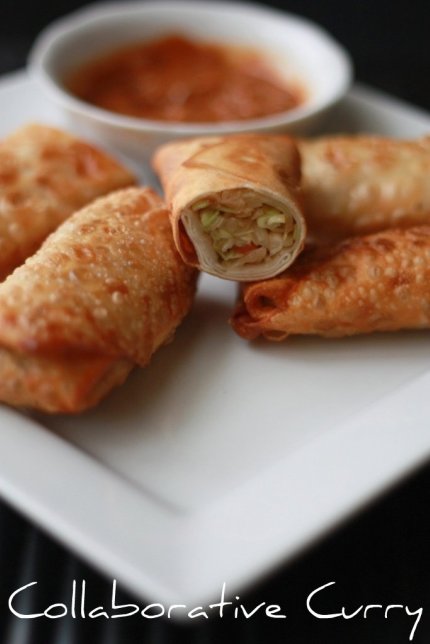
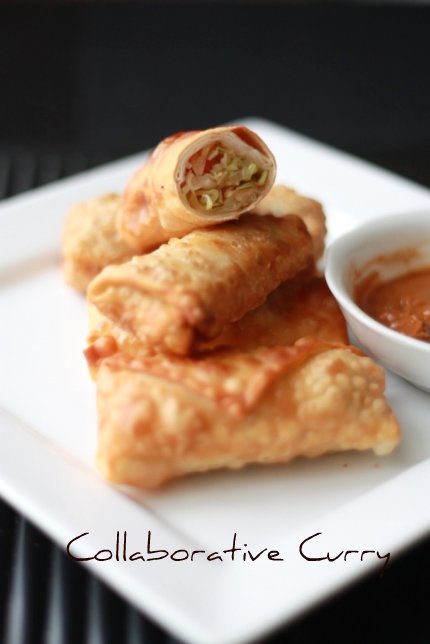
Egg Rolls
I doubt egg rolls need any introduction. They are popular as a starter in all Chinese restaurants. If you can buy a pack of egg roll wrappers from the store then its a quick snack you can have ready in minutes. They are great to treat an unexpected guest or even cheer up you kids on short notice, at home. Have fun biting into the crispy rolls bursting with a savory cabbage filling.
Egg Roll wraps - 6
Cabbage – 3 cups chopped in long strands
Carrots – ½ grated
Garlic - 1 clove finely chopped
Soya bean sauce – ½ tspn
Oyster sauce – ¼ tspn
Pepper – as per taste
Salt – as per taste
Method:
1. In 1 tspn of oil sauté the garlic followed with the cabbage and carrots
2. Add both the sauce and mix well and sauté till cabbage is cooked yet crispy to bite
3. Add pepper and salt as per taste. Most of the sauce is salty so check taste before you add any salt
4. Follow egg roll wrapping instructions on cover and deep fry in enough oil
Serve with ketchup or sauce of your liking
Contributor: Sunitha
Monday, January 25, 2010
Egg Puffs
Hope you had a great weekend. Since we were discussing teatime snacks in the last post, I decided to continue on that vein and share another popular snack. I have enjoyed puffs all my life. My mom used to get them from the bakeries on her way back from work and my sis and I devoured them.
It's inevitable that I talk about college days because they taught me the value of home made food. Another reason is unsatisfactory food in the hostel sometimes drive you for options outside. And these experiences get etched in your memory never to be forgotten. I cannot forget the puffs from college canteens either. They were life savers especially during my last hostel days where the food was intolerable. My friends and I, we would have one egg/veg puffs for breakfast which took good care of us till lunch time. Inspite of having them everyday I have to say I never got tired of them :-)
Flaky leaf like layers with spicy masala within is a deadly combination. Maybe we should call it 'death by pastry.' There are many variations you can do with the filling like meat, chicken, vegetables and egg.

Ingredients:
Puff pastry sheets-2(this will give you 12 puffs!)
Hard boiled Eggs-6
Onion- 1 small
Green chillies- 2-3
Coriander powder- 2 Tsp
Red chilli powder- 1/2 tsp
Garam masala/Meat masala- 1/2 Tsp
Salt- A pinch
Method :
1.Thaw the pastry sheets as per the directions on the packet. (for about 40 minutes)
2.Meanwhile cut the onion into very small pieces and saute it till it starts turning golden brown.
3.Throw in the chopped green chillies and saute for 2-3 minutes.
4.Add all the spices and mix well and saute for a minute.Switch off the heat.
5.Cut each pastry sheets into 6 equal pieces.First cut though the folds on it and then, cut the 3 big pieces into 2.
6.Divide the onion mix into 12 equal parts, or take 1 tsp of it and keep on the middle of each pastry slice.
7.Cut the boiled eggs into halves and place each half on the top of onion mix on the pastry sheets.
8.Fold each pastry slice to press and join the opposite ends. You could use the edge of a fork or use your hands.
9.Some of you may like to see the egg peeking through the sides, then you do not press it firmly :-)
10.Arrange them on a greased baking tray or baking tray lined with parchment paper.
11.Bake in a preheated oven at 400 degree F for 30 minutes or till the top turns golden brown in color.
12.Serve warm with tomato sauce/as it is and enjoy with a cuppa !

Notes:
1.Before baking you could brush the top with egg white, then you get the shiny and smooth top, unlike mine :-).
2.Vegetarians could replace eggs with some cooked and mashed veggies.
3.If you want only 6 puffs take only one pastry sheet and use half of all the other ingredients .
It's inevitable that I talk about college days because they taught me the value of home made food. Another reason is unsatisfactory food in the hostel sometimes drive you for options outside. And these experiences get etched in your memory never to be forgotten. I cannot forget the puffs from college canteens either. They were life savers especially during my last hostel days where the food was intolerable. My friends and I, we would have one egg/veg puffs for breakfast which took good care of us till lunch time. Inspite of having them everyday I have to say I never got tired of them :-)
Flaky leaf like layers with spicy masala within is a deadly combination. Maybe we should call it 'death by pastry.' There are many variations you can do with the filling like meat, chicken, vegetables and egg.
Ingredients:
Puff pastry sheets-2(this will give you 12 puffs!)
Hard boiled Eggs-6
Onion- 1 small
Green chillies- 2-3
Coriander powder- 2 Tsp
Red chilli powder- 1/2 tsp
Garam masala/Meat masala- 1/2 Tsp
Salt- A pinch
Method :
1.Thaw the pastry sheets as per the directions on the packet. (for about 40 minutes)
2.Meanwhile cut the onion into very small pieces and saute it till it starts turning golden brown.
3.Throw in the chopped green chillies and saute for 2-3 minutes.
4.Add all the spices and mix well and saute for a minute.Switch off the heat.
5.Cut each pastry sheets into 6 equal pieces.First cut though the folds on it and then, cut the 3 big pieces into 2.
6.Divide the onion mix into 12 equal parts, or take 1 tsp of it and keep on the middle of each pastry slice.
7.Cut the boiled eggs into halves and place each half on the top of onion mix on the pastry sheets.
8.Fold each pastry slice to press and join the opposite ends. You could use the edge of a fork or use your hands.
9.Some of you may like to see the egg peeking through the sides, then you do not press it firmly :-)
10.Arrange them on a greased baking tray or baking tray lined with parchment paper.
11.Bake in a preheated oven at 400 degree F for 30 minutes or till the top turns golden brown in color.
12.Serve warm with tomato sauce/as it is and enjoy with a cuppa !
Notes:
1.Before baking you could brush the top with egg white, then you get the shiny and smooth top, unlike mine :-).
2.Vegetarians could replace eggs with some cooked and mashed veggies.
3.If you want only 6 puffs take only one pastry sheet and use half of all the other ingredients .
Labels:
Appetizer,
Egg,
Kerala,
Kerala Dishes,
Snacks
Friday, January 8, 2010
Beef Fry/Irachi ulathiyathu- Kottayam Style
Kottayam is a town in central Kerala where I come from. Today I am sharing beef fry, a favorite among people from my state, made in the Kottayam style. Some of the best versions of this dish I hear is served in toddy shops. Toddy is the liquor from coconut tree/Palm Tree. There is an interesting read on toddy in Wikipedia. It's also interesting to note how these small shops considered taboo at one time is gaining popularity.
Disclaimer: if you are travelling to our state make sure a local person helps you buy things from the toddy shop or only go in after checking its okay to do so. I cannot gaurantee the safety of these places but only say that the food is excellent. In some of the popular tourist locations these place are safe but always use your judgment before making the decision

Ingredients:
Beef- 1lbs
Shallots/ Onion- 1/2 cup+1/2 cup
Red Chilli powder-1tsp
Ginger-Garlic Paste-1 1/2 Tbsp
Curry leaves- 1- 2 Sprigs
Vinegar- 1tsp
Oil-3 Tbsp
For Garam Masala
Tejpatta/Bay leaf- 1
Cinnamon -1 small piece
Cloves-2
Fennel seeds- 1 Tsp
Black Pepper corns- 5-6
For seasoning and frying:
Mustard seeds-1/4 tsp
Garlic sliced- 1/4 cup
Green chillies(slit)-2
Curry leaves-1 Sprig
Coconut Oil- 3 Tbsp
Method:
1.Grind everything listed under Garam masala, together.
2.Heat oil in a pressure cooker/ the pan you are planning to cook beef.Saute the 1/2 cup onion till it turns translucent.
3.Add the ginger-garlic paste and saute till the raw smell leaves.Add the chillipowder and masala and saute for 2-3 minutes.
4.Throw in the beef pieces along with a sprig of curry leaves and vinegar.Add a few tablespoon of water and cook well.(I do it till 2 whistles come )
5.Heat coconut oil in a frying pan,splutter the mustard and saute the remaining shallots, till it turns translucent.
6.Add the garlic slices and green chillies and saute for 3-4 minutes.
7.Add the curry leaves and cooked beef into this and fry till the beef turns dark brown in color.This will take 45 mins to 1 hour, on low heat.
8.Switch off the flame and wait for at least 1/2 an hour before you serve.
Whenever I make this, half the dish will be gone towards the end of the frying because some of the family will be snacking on it, and never wait for 30 minutes before serving :D)

Notes:
1.The recipe I have given is less spicy (for kids)
2.If you want to taste the authentic one, just add more peppercorns and chilli powder
3.Use coconut oil for the authentic taste :-)
4.You might be surprised to see that coriander powder is missing ;it's not a mistake :-)
5.You could add coconut pieces (thengakothu) while cooking the beef.
6. You could replace beef with lamb or mutton, if you do not take beef.
Contributor: Namitha
Disclaimer: if you are travelling to our state make sure a local person helps you buy things from the toddy shop or only go in after checking its okay to do so. I cannot gaurantee the safety of these places but only say that the food is excellent. In some of the popular tourist locations these place are safe but always use your judgment before making the decision
Ingredients:
Beef- 1lbs
Shallots/ Onion- 1/2 cup+1/2 cup
Red Chilli powder-1tsp
Ginger-Garlic Paste-1 1/2 Tbsp
Curry leaves- 1- 2 Sprigs
Vinegar- 1tsp
Oil-3 Tbsp
For Garam Masala
Tejpatta/Bay leaf- 1
Cinnamon -1 small piece
Cloves-2
Fennel seeds- 1 Tsp
Black Pepper corns- 5-6
For seasoning and frying:
Mustard seeds-1/4 tsp
Garlic sliced- 1/4 cup
Green chillies(slit)-2
Curry leaves-1 Sprig
Coconut Oil- 3 Tbsp
Method:
1.Grind everything listed under Garam masala, together.
2.Heat oil in a pressure cooker/ the pan you are planning to cook beef.Saute the 1/2 cup onion till it turns translucent.
3.Add the ginger-garlic paste and saute till the raw smell leaves.Add the chillipowder and masala and saute for 2-3 minutes.
4.Throw in the beef pieces along with a sprig of curry leaves and vinegar.Add a few tablespoon of water and cook well.(I do it till 2 whistles come )
5.Heat coconut oil in a frying pan,splutter the mustard and saute the remaining shallots, till it turns translucent.
6.Add the garlic slices and green chillies and saute for 3-4 minutes.
7.Add the curry leaves and cooked beef into this and fry till the beef turns dark brown in color.This will take 45 mins to 1 hour, on low heat.
8.Switch off the flame and wait for at least 1/2 an hour before you serve.
Whenever I make this, half the dish will be gone towards the end of the frying because some of the family will be snacking on it, and never wait for 30 minutes before serving :D)
Notes:
1.The recipe I have given is less spicy (for kids)
2.If you want to taste the authentic one, just add more peppercorns and chilli powder
3.Use coconut oil for the authentic taste :-)
4.You might be surprised to see that coriander powder is missing ;it's not a mistake :-)
5.You could add coconut pieces (thengakothu) while cooking the beef.
6. You could replace beef with lamb or mutton, if you do not take beef.
Contributor: Namitha
Labels:
Appetizer,
beef,
Gluten-free,
Kerala,
Kerala Dishes,
Meat,
Nonvegetarian Side Dish
Thursday, November 5, 2009
Sizzling Chicken Drumsticks
Over weekends, you will agree we all like to have some special food to enjoy family time. Last weekend, rather than buying frozen nuggets I decided to bake some drumsticks. I like experimenting with chicken because it beautifully adapts with a myriad of flavors. You add orange juice or mango or garam masala or whatever you can think of and chicken, like a sponge will absorb and blend with it to make a delectable dish.
So here is how I cooked the drumsticks. Go ahead and feel free to try different ingredients to personalize it.

Drumsticks – 6 nos
Soya Bean Sauce – 2 tbspn
Garlic Powder – ½ tspn
Chili Powder – 1 tspn
Pepper Powder – 1 tspn
Alcohol – 1 Tbspn
Oil - 1 - 2 tspn
Salt - to taste ( I did not add any because the soya bean sauce I have with me is quite salty, so if you are adding a sauce add salt with caution)

1. Add all the ingredients and marinate the chicken for at least two hours.
2. Line a dish with oil and set aside
3. Preheat oven to 350 degree F/ 180 degree C and bake chicken for 20 – 30 minutes. Time of cooking depends upon your oven so adjust accordingly.
4. 10 - 15 minutes through the cooking time check the chicken. Take the dish out and baste it (pour the juices and oil over the chicken) and flip the pieces to ensure both sides are equally browned.
5. Continue cooking.
6. Once chicken is cooked remove pan from the oven and add the alcohol, I added whiskey. You will hear the sizzling noise and an aroma is imparted which will definitely have your mouth watering.

Serve with pickled chili's, onions and tomatoes. This works well as a starter or make it a full meal by having some cooked vegetables with it.
Awards:
There have been a lot of awards being given away from Priya and Sangeetha and we accept and treasure them.
So here is how I cooked the drumsticks. Go ahead and feel free to try different ingredients to personalize it.
Drumsticks – 6 nos
Soya Bean Sauce – 2 tbspn
Garlic Powder – ½ tspn
Chili Powder – 1 tspn
Pepper Powder – 1 tspn
Alcohol – 1 Tbspn
Oil - 1 - 2 tspn
Salt - to taste ( I did not add any because the soya bean sauce I have with me is quite salty, so if you are adding a sauce add salt with caution)
1. Add all the ingredients and marinate the chicken for at least two hours.
2. Line a dish with oil and set aside
3. Preheat oven to 350 degree F/ 180 degree C and bake chicken for 20 – 30 minutes. Time of cooking depends upon your oven so adjust accordingly.
4. 10 - 15 minutes through the cooking time check the chicken. Take the dish out and baste it (pour the juices and oil over the chicken) and flip the pieces to ensure both sides are equally browned.
5. Continue cooking.
6. Once chicken is cooked remove pan from the oven and add the alcohol, I added whiskey. You will hear the sizzling noise and an aroma is imparted which will definitely have your mouth watering.
Serve with pickled chili's, onions and tomatoes. This works well as a starter or make it a full meal by having some cooked vegetables with it.
Awards:
There have been a lot of awards being given away from Priya and Sangeetha and we accept and treasure them.
Labels:
Appetizer,
Nonvegetarian Side Dish,
Poultry,
Starters
Subscribe to:
Posts (Atom)