Thursday, May 27, 2010

Oven Roasted Corn

How are you all? The weather is getting better everyday and to be frank I am sad that I'll miss the best part of summer this year because we are leaving for India. Of course India trip is quite exciting and it will be monsoon in Kerala which I haven't seen or felt for ages.

This may be the last post before I leave, but you will be seeing many more recipes from me since I have so many in my drafts which Sunitha will duly post. But I won't be able to come and visit you regularly as I used to while I'm away.  However, I hope you will continue giving us your love and support as always.  I will share a simple snack today which I am sure many of you already make. This is for those who do not have a gas top or grill at home.   Baking the corn.  I'll soon update a post on grilling corncobs once I am back from India.


Ingredients:

Corncobs
Butter
Salt
Lemon Wedges

Method:

1.Preheat the oven at 450 degree F.
2.Clean up the corn , brush them with butter and sprinkle some salt, and place them on a baking sheet which has aluminum foil on it.
3.Bake for 30-40 minutes, turning them every 10 minutes.
4.Once they are cooked well, change the oven to broiler and broil them at 500 degree F for 10-12 minutes. Change the sides every 4-5 minutes.
5.Brush some more butter and rub with the lemon wedges and serve warm.


Contributor : Namitha

Wednesday, May 26, 2010

Butter Chicken

   The summer days in Nashville are proving to be quite exciting.  Yesterday I went out to see the Chihuli exhibit in Cheekwood gardens.  They are beautiful artwork with blown glass.  I hate seeing very colorful, jazzy stuff in my favorite garden but I have to agree that it was quite tastefully presented keeping in sync with  colors around.  Obviously, I was tired after hours of walking around garden, and getting back home to cooking was the last thing on my mind.  However, there was nothing to eat at home so I had to cook.  I know I could buy something out but then again I wanted to eat Indian and it we don't have any close by.  I took the chicken breast I had frozen and cooked some butter chicken.  Since it was a small quantity it was not too much labor and this I hope will help some of you out there who like smaller proportions for cooking.  The effort was worth it though I could have done without cooking yesterday.  I hope you enjoy this recipe. 

Ingredients:

Chicken - 2 breasts

Marination
Yogurt - 1/3 cup
Chili powder - 1 tspn
Coriander powder - 1/2 tspn
Garam Masala - 1/2 tspn
Kasturi Methi - 1 pinch
Salt - 1 tspn
Turmeric Powder - 1/4 tspn

For the Gravy:
Cumin - 1/4 tspn
Black cumin - 1/4 tspn (shah jeera)
Onions - 1 medium size
Ginger - 1 Tbspn chopped
Garlic - 5 plump cloves chopped fine
Tomato - 1 Big (blanched, peeled)
Oil        - 2 Tbspn
Chili Powder -  1 1/2 tspn
Coriander Powder - 1/2 tspn
Garam Masala - 1 tspn
Kasturi Methi - 1 Pinch
Butter   - 1 Tbspn

 Method:
1. Mix all the ingredients for marination and mix in chicken breast cut in small pieces and keep aside for 1/2 hr to 1 hr
2. For the gravy: Heat oil in a pan and splutter both the cumin
3. Add the finely chopped onions and saute followed by ginger and garlic till translucent or even a little more done but I did not brown the onions
4. Switch off the fire, add in all the powders serve it out into a bowl and keep aside to cool
5. Once cool grind the onion mixture to a paste.  You could also add your blanched tomato at this time since it will give enough moisture to make a puree of all the ingredients together
6. Cook the chicken in the oil left from frying the onions on medium heat. This is to cook the chicken keeping it's juices intact.  So increase the heat a little but make sure the chicken is not overdone or brown.  When all the yogurt gravy sticks to the chicken and its cooked through add the ground puree
7. If you feel the gravy need more cooking allow it to cook with the chicken on medium to low fire for 10 to 20 minutes.  The gravy will bubble and splutter so you cook close it but also be aware the gravy tends to burn easily so make sure you are stirring it intermittently.  If you want the gravy thinner add water and let it come to  a boil.  I did not add any water since I wanted a thick gravy
8. Once the gravy is cooked add 1/4 cup of fresh cream, stir in and turn the fire off
 Contributor: Sunitha

Monday, May 24, 2010

Gothamb Ada (Unleavened Pan Cake with whole wheat flour and banana)

        Hope the spring/summer weather is treating you well.  We are enjoying some beautiful, though humid weather here in the south of U.S.  After a brisk walk around the block and some 'tread milling' in the gym I am feeling quite good.  Apparently, I had a roaring hunger when I got back home.  Grabbing a couple of ingredients I made some pan cake for myself. Growing up, my mother made this once in a while.  It's one of those lazy day breakfasts that can be put together in a jiffy.  Load with butter and coconut I love it but now resort to a little healthier version.  They are not a fancy fare unless your taste is an earthy, old fashioned one.  I find the uneven curly 'ada' quite to my taste in looks and taste. Hoping you will enjoy it too here is today's recipe.
Ingredients:

Whole wheat flour - 1/2 cup
Banana                  - 2 small or 1 big
Sugar                    - 1 tspn
Salt                       - 1/8 tspn
Milk                      - 3-4 Tbspn
Coconut                - 2 tspn
Method
1. Mash bananas and mix together with wheat, salt and sugar and coconut
2. Add milk to make the batter a little softer
3. The batter is the consistency between a bread dough and pan cake dough
4. Heat a pan and spray a little oil
5. Ladle half of the batter into the tawa and spread using your fingers. 
6. To avoid the dough from sticking to your fingers dip you fingers in water and then slowly spread the dough to make a round cake
7. Cook on both sides till a lightly browned.


Contributor: Sunitha

Friday, May 21, 2010

Rugelach

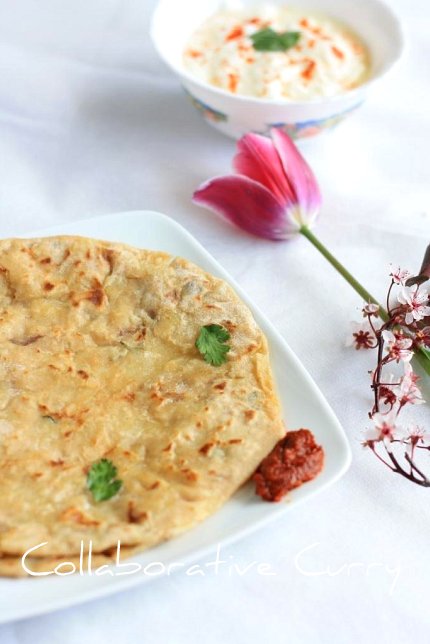
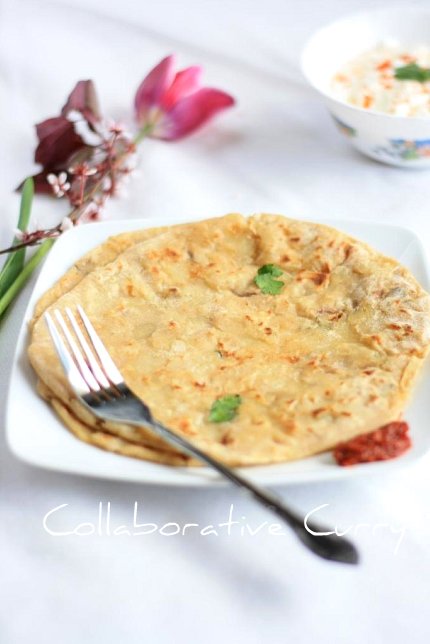
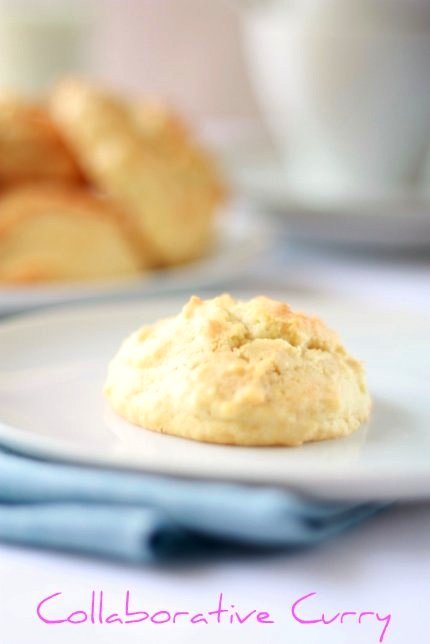
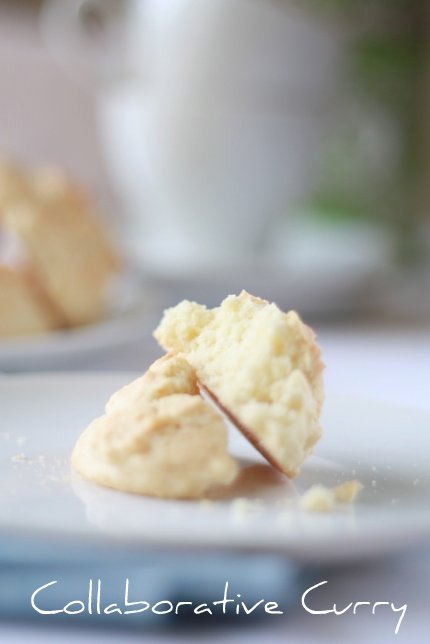
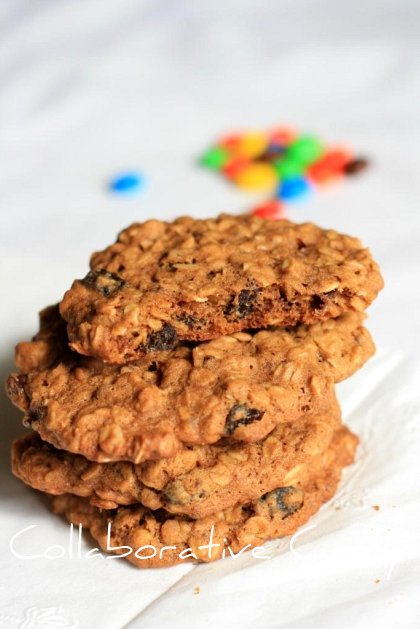
   This is an elegant cookie from the Jewish Cuisine, usually made during the time of Hanukkah. When my daughter saw the picture of this in the cook book I lent from the library, she asked me whether I could make it for her. How could I say no when I wanted to try them myself.  I was super glad it came out looking pretty as I expected.  Enjoy your weekend!


Ingredients:

Cream cheese- 8 ounce
Butter- 1 cup
Flour- 2 cups
Sugar- 1/4 cup
Salt- 1/4 tsp

for filling:

Semisweet chocolate squares- one 4 ounce square
Walnuts- 1 1/4 cup
Strawberry/Raspberry jam- 1/2 cup
Brown sugar- 1/4 cup
Cinnamon- 1 tsp


Method:

1.Beat the cream cheese and butter till they become smooth.Throw in the sugar and salt and mix well.
2.Add the flour and beat to mix well. Knead using your hands to make a soft and smooth dough.
3.Make 4 equal balls out of this and keep them covered in the fridge for at least 20 minutes.
4.Make the filling ,meanwhile. Throw in the chopped chocolate and walnut into the blender and blend it till they have mixed well, but the nut is only coarsely ground.
5.Mix this and the jam, sugar and cinnamon and keep aside.
6.Preheat the oven at 375 degree F.
7.Take out the dough from the fridge and roll each of the dough ball into ~9 inch rounds using a rolling pin.
8.Spread 1/4th of the filling evenly on it.
9.Cut each round into 4 equal parts and then each 1/4th to 3 equal parts.This will give 12 equal pieces.
10.Now starting from the wide edge roll up each cookie and place them with the end tucked to the bottom.
11.Chill it for 20 minutes before baking.
12.Keep in the oven and bake for 20 minutes or till they start changing to a light brown color.
13.remove to a wire rack and let cool completely before storing in a airtight container.


Notes:

1.The filling is up to your imagination. You could replace the walnut with toasted pecan or almond.
2.Also you could avoid adding chocolate if you wish.
3.Chilling the rolled up cookies before baking helps to prevent them from spreading.
4.I baked them in two batches, using up two balls of dough each time.
5.You could give the cookies an eggwash, that will give a shiny brown color to the cookies. I didn't do it, since my family doesn't like the egg smell on their cookies :-)
6.If you are doing an egg wash, beat an egg with a tablespoon of water and brush it over the cookies before baking.
7.The original recipe calls for Kosher salt an inevitable ingredient of Jewish cooking.

Recipe adapted from: Baking at home, CIA

Contributor: Namitha

Thursday, May 20, 2010

Tomato Chutney

     At times I get these urges to make dosas.  My favorite is masala dosa but since its heavy and I am trying very hard to cut down on carbohydrates I will have to settle for a plain dosas.  However, I still wanted to do something special and make this a little more exciting.  What do I do? I made some tomato chutney.  I hope you will enjoy it.

Ingredients:
Gingelli oil                                            - 1 Tbspn
Chana Dal (dry split chickpea)             -  1/2 Tbspn
Urad Dal (                                           - 1 tspn
Onions                                                - chopped fine about 1 cup
Garlic                                                  - 2 cloves plump, chopped fine
Tomato                                               - 1 medium size chopped fine
Chili Powder                                       - 1/2 Tbspn (its spicy so go easy on it if you like it milder)
Tamarind                                            - 1/2 tspn (a few pinches
Salt                                                    - 1/4 - 1/2 tspn (use as per taste)
Coriander Leaves                               - 4-5 sprigs finely chopped

Method:
1. Heat oil in a tawa and fry the chana dal and urad dal
2. Once the dal turn golden add the onions and fry till translucent
3. Add garlic and saute a minute followed with tomato
4. Once the tomato has been sauted add all the chili powder
5. Turn the heat off, let it cool grind in a blender with the tamarind and coriander leaves to a fine paste
Note:
You can use this as a dip or on dosas.
Contributor: Sunitha

Wednesday, May 19, 2010

Aaloo Paratha/Indian Bread with Potato filling

Everyone has their own version of aaloo paratha and here is mine. The most popular paratha is a favorite at  my home.  My kids are happy when I serve these and that in turn makes me happy.  What I like the most about parathas is that I do not have to make any side dish to go with them.  Whip up a raita (spiced yogurt) and a spoon of pickle and the deal is sealed.

Photography: There have been a couple of questions over time about  our photography.  Neither of us feel equipped enough to field all your questions, but some of the basic information you asked us are as follows.  We both use Canon DSLRs, do not use photoshop for editing. However, sharpness and contrast are worked on minimally at times using the software that comes with canon cameras or flickr.  No reflectors nor special lights are used unless taken at night which is usually under tungsten light (regular bulbs). Both of us takes pictures by the windows and sometimes patio working with plenty of light.  We hope some of this information is helpful.  We will work on a detailed post covering our interest and what we have gleaned about photography over this short time of blogging.  Please give us time as we don't foresee it happening at least for 6 months.  We still think we are learning and growing in this area and do not want to talk more than we know.  Thank you all for you continued support.


Ingredients:

For Bread :

Whole wheat flour- 2 Cups
Salt- To taste
Water- ~1 cup

For filling:

Potato,boiled and mashed- 2 Medium sized
Onion,finely chopped- 1 small or half of a big one
Coriander leaves chopped - 2-3 Tbsp
Garam masala- 1/2 tsp
Chaat masala- 1/2 tsp
Salt
Oil


Method:

1.Mix the salt and flour, slowly pour the water and knead the dough well.
2.Knead for a few minutes and let the dough rest at least for 15 minutes before you start rolling them
3.Meanwhile prepare the filling. Heat oil in a pan. Saute the chopped onions till they turn translucent.
4. Add the masala powders and saute for a minute.Add the salt
5.Switch off the heat , add the mashed potatoes (make sure that there are no chunks) and chopped coriander leaves into this and mix everything well.
6.Make small balls of dough for making rotis.
7.Make the equal number of balls from the potato mixture too. These should be at least equal in size as the dough balls or bigger than that.
8.Roll each ball of dough till it reaches the size of poori, place the potato ball in the center and fold from all sides to close it.
9.Leave these stuffed balls with the closed edge facing to the bottom, and let it sit for at least of couple more minutes before rolling.
10.Repeat the same for other dough and potato mixture. You should keep the filled balls covered all the time.
11.Now roll out the stuffed balls till they reach about 1/4 inch thickness.
12.Heat a skillet and cook the parathas on both sides by flipping them over. Brush with oil/ghee/butter on both sides
13.Serve with raita/yogurt and pickle/your choice of side dish.


Notes:

1.Do not overcook the potatoes, also do not keep them in cold water for cooling them down. Both these lead to excess of water which is not good for parathas.
2.Keeping the potato filled dough for a couple of minutes helps to prevent the sides from breaking while you roll them.

Tuesday, May 18, 2010

Khara Bath (Vegetables and semolina)

   If you have been to Bangalore, India you will see a lot of Khara Bath, chow chow bath etc served in the 'sagar' restaurants.  My husband loves this stuff.  I could never understand for the life of me how someone asks for 'upma,' as I call it, when in a restaurant.  I mean, you have choices of batura, puris or even dosas.  Well, like all things goes in life men and women are wired different and I attributed this taste of his also as being another of the man syndrome.  However, after trying several times to imitate the taste of the restaurant khara bath at home and eating them I have developed a taste for it myself.  Now, once in a while we make some khara bath for breakfast and have decided man or woman you can enjoy this food.

  Weather Report: When its awful I can't help but let you in on some news on the subject.  Its dreary, murky, awful outside. I have been stuck at home except for an occasional walk around the block now and then for the last week or so and its a bother.  Without dragging you into my woes let me suffice by saying I have bad weather around here and a dish that looks like 'spring just arrived' helps lift my spirit a wee bit.  Some cheer, any cheer for this weather.  Cheers!!


Ingredients:
Semolina                   - 1 Cup
Butter                        - 1 Tbspn
Oil                             - 2 Tspn
Mustard                    - 1/2 tspn
Onions                      - 1/2 cup chopped
Green Chilies             - 3 or 4 thai chilies
Tomato                     - 1/2 cup finely chopped
Green Peas               - 1/2 cup
Carrot                       - 1 medium size finely chopped
Bell Pepper               - 1/2  of a medium sized pepper about 1/4 cup when chopped fine
Curry Leaves            - 1 sprig
Coriander Leaves      - 3 - 4 sprigs finely chopped
Asafoetida                 - 1/4 cup (if you do not like the taste then just a pinch or so)
Turmeric Powder      - 1/4 tspn
Coriander Powder    - 1/2 tspn


Method:
1. Boil 3 cups of water and set aside
2. Heat oil in a pan and either add clarified butter or splutter the mustard
3. Add the chopped onions and saute along with the butter (I add butter at this point or sometimes even later because if we try to add it along with the oil the butter turn an awful brown color)
4. Once the onions are golden brown add turmeric, asafoetida and coriander powder and mix and quickly add in the tomatoes and stir to avoid burning off of the powders
5. Once the tomatoes are cooked for a couple of minutes add all your vegetables and stir fry them to cook
6. Once you vegetables are all done or about 3/4 done add a cup of the upma rava (semolina) and stir
7. Stir until you can hear crackling sound or you can detect the aroma of fried rava.  If you are not sure what you are looking for make sure you stir fry the rava atleast for 5 minutes making sure its does not burn
8. Add chopped coriander leaves and stir it in along with 1 tspn of salt.  It maybe a good practice to add the salt to the water and tasting to make sure its salty enough.  I added about 1 tspn salt and it worked well but you might need a little more or less as per your taste.
9. Add the boiling water slowly stirring all the while.  Make sure you do this at medium to low fire because it tends to bubble and splatter and if not careful and you get it on your hand it stings and may even burn.   
10. Taste to make sure the semolina is cooked which it will in a couple of minutes
11.  The dish is kind of gluey and sets on cooling.  Serve hot with coconut chutney and pickle

Contributor: Sunitha

Monday, May 17, 2010

Palmiers/Elephant ears

This is one of the simplest cookies to make.  If you have some puff pastry sheets on hand its easy peasy. This is a French cookie, classic, elegant and to emphasize simple to make.  The other day I was wondering what else I can do to cheer up the little ones.  Weekends, if you have children, you know how all the games, and charging around the house makes them hungry.  Anything you make generally gets tidied out.  Nevertheless,  having a blog to feed parallel to my kids a new recipe is to kill two birds with one stone.  Loved the way this panned out.  It not only serves my general purposes but delightfully crunchy, tasty and pretty to boot cookies make a good snack to serve at tea for your guests too.


Ingredients:

Puff Pastry Sheet- 1
Granulated sugar- 1/3 cup
Cinnamon - 3/4 tsp
Walnut, coarsely ground- 3 Tbsp

Method:

1.Thaw the puff pastry sheet for 30-40 minutes.Preheat the oven at 400 degree F.
2.Mix the sugar and cinnamon and spread a couple of Tbsp,evenly on a flat surface where you could roll the pastry sheet.
3.Place the pastry sheet with the shorter edge facing towards you.
4.Mix the walnut into the sugar cinnamon mixture and pour that on top of the pastry sheet.\
5.Spread the mixture evenly on the pastry sheet.Now roll it till the sugar mixture adhere well on both sides of the sheet.You do not have to roll it bigger, just a few inches more on both sides, evenly, will do.
6.Fold the sides of the square towards the center so that they go halfway to the middle. Fold them again so the two folds meet exactly at the middle of the dough.Leave a 1/4 inch space in the middle.
7.Now fold both the sides , one half on the other half, so that you will get 6 layers.
8.Cut the slices that are between 1/4 and 1/2 inches wide and place them cut side facing upwards on a baking sheet.
9.Bake for about 14-15 minutes or till both the sides turn a light brown.You may change the sides after 13-14 minutes and continue baking the other side too.


Notes:
1.This will yield you about 22 cookies.I recommend that you make this with 2 pastry sheets, this will be over in seconds :-)
2.This is not too cinnamony, since we like it this way.If you wish you could add more cinnamon or do not add any.
3.Also the sugar is just perfect for our taste.You could add little more if you like really sweet cookies.
4.This is so versatile, that you could use your imagination to add or delete anything into the sugar.The basic recipe just calls for sugar and pastry sheet :-)
5. Rolling is not a must, you could leave this step, but then the filling will not stay much.


Contributor: Namitha

Friday, May 14, 2010

Rasam

Rasam can be made in several ways.  If you travel to Kerala and eat at a local restaurant your table will always have two or three white jugs filled with rasam, butter milk and another with spiced, warm buttermilk.  These come on all table in spite of a sambar or dhal curry.  I always like the rasam they serve which is watery, tangy and spicy.  I can drink it as it is reminding me of a clear thin soup.  Today, I am sharing this recipe with some tricks shared by a Tamil friend of mine.  She encouraged me to just bring the rasam to boiling point and never over boiling.  I have to agree with her that the taste of the rasam when just brought to boiling point is just right for my taste rather than when its is let to boil for a long time.  I know there will be difference of opinion on this but I like my rasam the best this way.  Again, this is spicy, tangy and lip smacking.

Ingredients:
Tomato (on the vine kind) - 2 medium
Shallots chopped    - 1 Tbspn
Garlic                     - 6-8 cloves (plump)
Curry Leaves         - 1 spring
Dry red chilies        - 5
Green chilies          - 2 (optional)Jeera                      - 1/4 tspn
Mustard                 - 1/2 tspn
Asafoetida             - 1/4 tspn
Methi powder        - 1/4 tspn
Turmeric                - 1/2 tspn
Coriander Powder - 1/2 tspn
Pepper powder      - 1 tspn
Marble size tamarind
Water - 5 cups
Salt - 1 1/2 tspn table salt (Please use your judgment when adding salt)
Oil - 1 Tbspn 

Method:
1. Crush the chopped tomatoes with your hand or a spoon. This can be coarse not a paste
2. Soak the tamarind in about a cup of water
3. Heat oil in a pan and add mustard and jeera
4. Once the mustard splutters add shallots, green chilies, red chilies and curry leaves and saute
5. When your onions are translucent add the garlic and saute
6. Follow up with all the powders and saute adding the tomato without burning the powders
7. Stir for a minute and add 4 cups of water
8. Mix the tamarind water with your hand making sure you have extracted the tamarind and its mixed in the water
9. Bring the whole mixture to a boil add about a handful of chopped coriander leaves.

Notes:
1. The taste as I have mentioned is when you just bring the rasam to a boil and not over do it.


Contributor: Sunitha

Thursday, May 13, 2010

Mampazha Pachadi/ Mango in mustard-coconut gravy

One more mango recipe, from my drafts. I love this sweet and savory pachadi, and the recipe is from my mom in law.  During the mango season we serve this dish for our sadya (feast) as well.  There isn't much else going on but the weather which is most bizarre these days.  It snowed yesterday and foiled my plans of  photographing some yummies yesterday.  I am sitting with my fingers crossed for bluer skies and melting snow.  Hoping you have great weather and fine time today!


Ingredients:

Ripe Mango- 1
Green chilles- 1 or 2
Turmeric Powder- a pinch
Grated coconut- 3 Tbsp
Cumin seeds- 1/3 tsp
Mustard seeds- 1/2 tsp
Grated jaggery- 1 Tbsp/ to your taste
Yogurt- 1/4 cup

For seasoning:

Coconut oil- 2 tsp
Mustard seeds- 1/4 tsp
Red chillies- 2
Curry leaves- a sprig

Method:

1.Peel off the skin and cut the mango into big pieces.You could add the seed too into the pachadi.
2.Cook the mango along with enough water,green chillies,turmeric and salt.When it is almost cooked add the jaggery and cook for another 5 minutes.Mash them well.
3.Grind together the coconut and cumin to a fine paste with as little water as possible.
4.Grind the mustard seeds coarsely, preferably using a mortar and pestle.
5.Heat the oil in a pan.Splutter the mustard seeds and saute the red chillies and curry leaves,coarsely ground mustard seeds, then the ground coconut paste.Saute till all the water is absorbed.
6.Spoon out this into the mango mixture and cook for 3-4 minutes, switch off the heat.
7.Blend the yogurt with a spoon and add it to the mango coconut mix and mix well.Serve with rice and other side dishes.


Notes;

1.Normally in Kerala we use the local variety called "nattumanga" for preparations like this and the mango has its own specific flavor.You won't be able to replicate it with store bought mangoes ,but when you have no other choice like me, you could try this.
2.If you are using the above mentioned mango, then just peel off the skin using your hands and add the skin and the seed that has flesh on it for making pachadi/ pulissery.
3.You could add sugar instead of jaggery if you do not have jaggery, but the flavor from the jaggery makes this pachadi perfect .

Contributor: Namitha

Wednesday, May 12, 2010

Butter Scones

  If you are bakery chef and think I have broken all rules for scones in the following recipe you are probably right.  There are many things that go through trials in my kitchen that never see the light of blog.  Nevertheless,  today in spite of the scones recipe being trial it came out pretty well and taste rather nice.  As such, I decided I can brave to show them to you.  I picked up a recipe from 'all recipes' but I didn't have all the ingredients they talked about so I did my own thing.  Please try them. I know pictures are probably not the best to show off taste but I am sure you will believe me when I say, this one is a winner. 
Ingredients

2 cups all-purpose flour
2/3 cup sugar confectioners sugar
1 Tbspn granulated sugar
1 teaspoon baking powder
1/4 teaspoon baking soda
1/2 teaspoon salt
10 tablespoons unsalted butter, frozen
1/2 cup heavy whipping cream
1 large egg

Method:

1. Preheat oven to 400 degrees.
2. Mix the flour, sugar, baking powder, baking soda and salt in a bowl.
3. Grate butter into flour mixture and using your fingers make a coarse meal
4. In another bowl whisk sour cream and egg until smooth. (I whisked with a fork)
5. With the same fork mix in sour cream and egg mixture into flour
6. Mix until large dough clumps form.
7. The dough was quite wet and I added another tablespoon of flour and mixed in
8. spooned the dough onto the cookie sheet and bake for about 15-20 minutes

Contributor: Sunitha

Tuesday, May 11, 2010

Oatmeal Raisin Cookies

This has been lying in my draft for quite some time. I made them even yesterday and thought it's high time I brought it to you.  This is one cookie that my entire family loves and keep asking for. I have baked it several times and it never lasts for more than 3-4 days.  If you haven't tried this yet, I assure you that you and your family will love them, even if they hate oats, just like my hubby.


Ingredients:

Oats- 3 cups
Flour- 1 1/3 cup
Salt- 1/4 tsp
Cinnamon- 1 tsp
Baking Soda- 3/4 tsp
Butter- 1/2 cup plus 6 tbsp/ 1 cup :-)
Brown sugar(packed)- 2/3 cup
Granulated white sugar- 1/3 cup
Eggs- 2
Pure Vanilla extract- 1 tsp
Raisins- 1 cup
Walnuts chopped (optional)- 2/3 cup


Method:

1.Preheat the oven at 350 degree F.Whisk together Oats, flour,cinnamon and baking soda in a large mixing bowl.
2.Beat the butter (at room temp) and sugar welluntil it is soft.
3.Add the eggs and mix well, followed by vanilla extract. Beat well to mix in everything.
4.Fold in the wet mixture into the dry one, alternating with raisins and walnuts (if adding any) and spoon onto a cookie sheet lined with parchment paper.
5.Bake for 8-10 minutes or until the sides and bottom starts turning slight brown, and the top still looks like it is not done.
6.Cool on a wire rack, completely, before transferring to an airtight container.


Note:

1.Adapted from various internet recipes.
2.These are just perfect,crunchy on outside and chewy inside and yumm.
3.I have tried them with just brown sugar and with a combination of both brown and white. Both works fine.
4.Also have tried with 1 3/4 sticks of butter and 1 cup (2 sticks) of butter.It sure is better when you use 1 cup :-)
5.If you keep the dough in the refrigerator for some time, you will get thicker cookies. As any other cookie dough, this also spreads out a bit if the dough is not cold. (when I took this picture, I didn't have the patience to wait !)

Contributor: Namitha

Monday, May 10, 2010

Beet Leaves Sauteed

     The weekend flew.  Belated Mother's Day wishes to you if you.  Getting past the greetings, I have another 'thoran' for you.  I know that most of the thoran is made the same way and you don't need another recipe yet again.  However, this post is for you who have not yet made beets thoran.  I have to tell you its as good as any green leaf thoran you make and the bonus is the red color.  Please follow our recipe for spinach thoran for tips and tricks to cook the leaves nice and dry.


Ingredients:
Beets Leaf     - 1 Bunch
Coconut        - 1/4 cup
Shallots         - 2 nos
Green Chilies - 4
Mustard         - 1/4 tspn
Curry Leaves - 1 sprig
Turmeric        - 1/4 tspn
Method:
1. Add a tablespoon of oil and crackle the mustard
2. Add the coconut, shallots and green chilies thinly sliced together with the turmeric
3. Add the chopped leaves and open cook till done
Contributor: Sunitha

Friday, May 7, 2010

Manga Chammanthi/ Mango Chutney

  Another mango treat made during this season.  Summer and the raw mango season is fast fading in Kerala, India but without letting you in on how to make mango chammanthi it will not be complete.  Mostly we use the mangoes that fall down from the tree, before they mature,for this chutney.  The sourness of mango soothed over by sweet coconut and then taken a notch up on the spicy scale with green chillies this is all you will need with hot rice.  I have to admit I can eat a plate of rice with just this and some curd. I will not let any other flavors bother this rich, spicy taste.  Give it a shot and let me know what you think     


Ingredients:

Mango slices- 2-3 (2 by 4 inch pieces,preferably the flesh, closest to the seed)
Coconut grated- 1/3 cup
Green chillies- 2 or 3
Shallot- 1
Curry leaves- 2
Salt- to taste

Method:

1.Peel off the skin from mango slices.
2.Grind everything together in the small bowl of a mixie/ on the "ammikkallu" without adding any water.
3.If you are grinding using an "ammikkallu"/arakallu grind the coconut and mango first followed by green chillies, shallot and salt. Finally grind everything together/mix together.
4.Serve with rice,thoran and curd/yogurt.Believe me,if you haven't tried this one yet, it tastes divine :-)


1.I did grind this in a mixie, the presentation is just for the camera ;-)
2.You could add more or less mango slices, according to your sourness level.

Sending this to "Green Gourmet event" hosted by Preeti of Write food.Happy hosting, such a cool event Preeti :-)


Contributor: Namitha

Thursday, May 6, 2010

Rajma

     I am quite a South Indian at heart when it comes to food.  I like North Indian cuisine and do enjoy them occasionally but I am not a fan.  However, my husband is huge on North Indian cuisine.  Rotis, parathas, rajma, dal you name it he likes it.  If there is the aroma of a good garam masala in the curry he is a happy camper.  So I put some rajma together to go with rotis for dinner. I will have him eating out of my hands (figuritively) today and I hope you get someone wound around your fingers with this curry too.  If the way to a man's heart is his stomach this dish is a definite means to that end.

Ingredients:
1. Rajma  - 1 cup (soak overnight)
2. Onions - 2 cups finely chopped
3. Tomato - 2 nos finely chopped (best when blanched and pureed)
4. Ginger  - 2 tspn finely chopped
5. Garlic   - 2 tspn finely chopped
6. Coriander powder - 3/4 Tbspn
7. Chili Powder - 1/2 Tbspn
8. Turmeric Powder - 1/4 tspn
9. Cummin Powder - 1/2 tspn
10. Garam Masala - 1 tspn
11. Pepper - 1/4 tspn
12. Nutmeg Powder - 1/4 tspn
13. Shahi Jeera (Black Cummin) - 1/4 tspn (I took whole and then crushed them)
14. Canola Oil - 2 Tbspn
15. Coriander Leaves for garnishing optional

Method:
1. Soak a cup of rajma overnight.  Clean and pressure cook in a cup of water and 1/4 tspn salt
2. Heat oil in a pan saute onions till translucent
3. Add chopped ginger and garlic and saute till the onions are golden brown
4. Add all the powders either mixed together in a little water to make a paste or as is.  (Mixing in water to make a paste helps to prevent the powders from being burned off). I crushed shahi jeera and added along with the nutmeg and garam masala
5. Saute till oil leaves the pan.
6. Add chopped tomatoes (if its not pureed then the skin may float so be sure to either chop them fine or use pureed tomato or canned puree) If canned puree, about 2 Tbspn will suffice
7. Saute well and add the cooked rajma
8. Take a heavy ladle or round bottomed big spoon and mash about 1/4 of the rajma.  I like to do this to thicken the gravy as well as blend in the taste
9. Be sure not to mash too many of the rajma the nice blend a little mashed and some whole enhances taste and appearance
Notes:
1. You could add a dollop of fresh cream and chopped cilantro as garnish
2. Addition butter about a Tbspn before taking the curry off the stove butter blends into soothing and taking the curry a notch above the ordinary.
3. Serve with rotis or rice
Contributor: Sunitha

Wednesday, May 5, 2010

Strawberry Banana Smoothie

Hope you are all enjoying the warmth of Spring.  It's beautiful out here.  Trees in full bloom, birds busy making nests and laying eggs, its a wonderful time of the year to watch and engage in the life around.  Wherever I turn I feel and see new life ! Kids are happy playing in the lush green lawn and my younger one is getting a chance to spent all that pent up energy.  After our play in the yard a glass of fresh smoothie is just the thing to add to the zing.  I am sure most of you know how to make this.  This is a gentle reminder to you in case you forgot how tasty a strawberry smoothie can be on a Wednesday afternoon.


Ingredients:

Strawberries- 10-12
Banana- one medium size
Sugar
Ice cubes-3-4
Milk/Strawberry banana yogurt- 1 cup

Method:

1.Clean and hull the strawberries
2.Peel off the skin from banana and cut into big chunks
3.Throw in these with other ingredients in a blender and blend until they become smooth.


Notes:

1.You could add a scoop of vanilla/strawberry ice cream to make it more rich.
2.If you are using over ripened banana, you may not have to add one full banana.


Contributor: Namitha

Tuesday, May 4, 2010

Celery stir fry with coconut/ Celery Thoran

         After torrential rain over the weekend we have a clear blue sky and sunny morning.  These are good reasons to perk up and feel good.  There is no reason to indulge in a carbohydrate fare, release serotonin and  then feel good.  It's celery day.

  I stir fried celery for lunch.  I never thought it will taste good as a thoran.  Celery always brings to mind a strong flavor which goes with Chinese and Continental cooking and I never imagined it to adapt to the Indian cuisine.  When my friend mentioned how they had celery thoran I twisted my lips and made an ugly face, thank god I was on the phone and she didn't see me do that.  I was intrigued nevertheless.  But not enough to try it instantly.  After a year since that conversation, this morning I tried.  Seeing I had piled up celery which were  expediently bought for the purpose of making Chinese stir fry, I decided to give thoran a go.  What do you know, it was pretty good.  I cannot talk flowery language on how ground breaking the taste is but it definitely works well as a thoran.  I am enjoying this new addition to my repertoire of thoran.  Celery.  You will enjoy it too.
Ingredients:
1. Celery - 5-6 stocks (I measured out 3 cups chopped)
2. Onions - 3 Tbspn finely chopped
3. Garlic   - 1 Clove finely chopped
4. Green Chilies - 3 nos finely chopped
5. Mustard - 1/4 tspn
6. Turmeric - 1/4 tspn
7. Coconut - 1/4 cup
8. Canola Oil - 1 Tbspn
9. Salt - a little less than 1/4 tspn (or to taste) table salt

Method:
1. Heat oil in a wok or shallow wide pan and slip in the mustard
2. Once the mustard pops add the chopped onions, garlic and green chilies and saute
3. Follow up with chopped celery and turmeric powder and stir in
4. Add the grated coconut and salt stir to mix well
5. Close with a lid and on low to medium fire or heat cook
6. Celery should express water which aids the cooking but be sure to stir to avoid burning
7. Once cooked which will be in 5 - 6 minutes serve with rotis or rice.

  Contributor: Sunitha

Monday, May 3, 2010

Chakkakkuru-Manga Curry/ Jackfruit Seeds and Raw Mango Curry

In Kerala, we make use of almost everything from the Jack fruit tree.  Excuse the exaggeration but think about it.  We use the leaf to scoop gruel and in spite of having cutlery we still do it for fun.  We cook the jack-fruit when its raw and eat it with a gravy, when ripe, ofcourse, we eat them as you would any other fruit.  We seldom stop there.  Steamed rice flour topped with jack-fruit, mix of rice flour and fruit pressed between a banana leaf and pan baked are all but a few things variations.  The outer covering cut into small pieces are fed to the cattle.  Now for the seed.  The topic of today's discussion.  Its hard and seems rock like when raw but when cooked powders like baked potato.  Most times it is sauteed with coconut pieces or otherwise made into the scrumptious gravy paired with mangoes like I am sharing with you.  Another summer treat these are some dishes which makes me nostalgic beyond my own comprehension. Hope you will see now that it si no exaggeration when I say we make good use of Jack-fruit tree.


Ingredients:

Raw Mango slices- 1/2 cup (3/4th of a mango)
Jackfruit seeds- 10-12
Turmeric powder- 1/4 tsp
Coconut grated- 3-4 Tbsp
Cumin seeds(jeera)- 1/4 tsp
Green chillies- 2
Shallot- 1

For seasoning:
Coconut/ any cooking oil- 2 tsp
Mustard seeds- 1/4 tsp
Red chillies- 2
Curry leaves- 1 sprig

Method:

1.Slice the mango after removing the skin. Cut each jackfruit seed into 4 pieces.
2.Cook the Mango slices and jack fruit seeds together after adding some salt and turmeric and water in a pressure cooker.
3.Grind together the grated coconut, cumin, green chillies and shallot together.
4.Mix this with the cooked veggies and cover and cook again for 3-4 minutes.
5.In a small pan do the seasoning(heat the oil,splutter the mustard seeds and throw in the red chillies and curry leaves and saute) and pour over the curry. Mix and serve with rice.


Notes:

1.You may want to add or reduce the number of mango slices,depending on its sourness level.Mine was medium sour.
2.If the mango slices are not mashed even after the seeds are cooked, mash them gently.
3.This is not recommended for people who have gastritis problems

I won a giveaway by Gina of Simply life and see what I got. A package of POPCHIPS which had all the 6 flavors, 4 packets each. We all loved it and thanks again Gina :-)


Contributor: Namitha