Wednesday, July 28, 2010

Kale Saute

   I keep buying Kale and throwing it out.  Yeah! I love them in soup, so I see fresh Kale and get drawn to it like iron to magnet.  However, the minute they come home all the magnetism is lost so to speak.  The last trip to the store had me doing the same but I sauteed then today.  Its good.  It has a bite to it which is quite interesting.  You might want to cook it on low fire covered to get it well done..  You may also add a couple of spoons of water to soften the leaf while cooking.  Even now my best way of having kale is in a soup but I have been munching on the leaves for a while now as I write and its growing on me.  So here is how I made Kale today.

Ingredients:
Kale - 1 Bunch
Green Chili - 3
Onions - 1/4
Garlic - 2 cloves
Soya Bean Sauce - sprinkle
Oil - 1/2 Tbspn
Salt - to taste
 Method:
1. Tear the leaves off from the stem
2. Heat a tablespoon of oil and once heated add chopped onions and garlic and follow it with the leaves
3. Stir well add some soya bean sauce.  I sprinkled some on maybe about a tspn
4. Close and cook on low fire and stirring in between till done. Check for salt and sprinkle some if needed

Notes:
The leaf is quite chewy and the flavor has a bite to it which I quite liked.  I am sure we could make an Indian style thoran and it will be quite tasty too.

Contributor: Sunitha

Tuesday, July 27, 2010

Paal Payasam/Rice Kheer to say "Happy B'day Sunitha" !

Dear Sunitha,

I wish for you to have people to love, people in your life who will care about you as much as I do. Happy birthday dear !


Dear Readers,

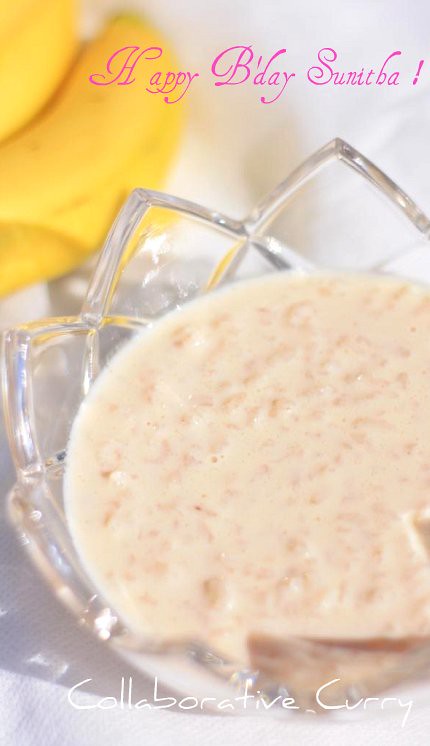
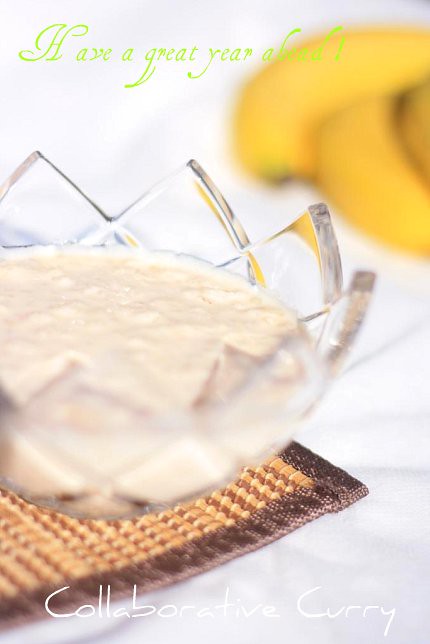
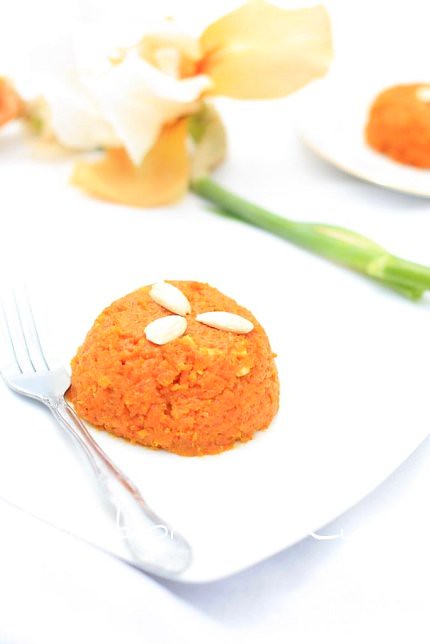
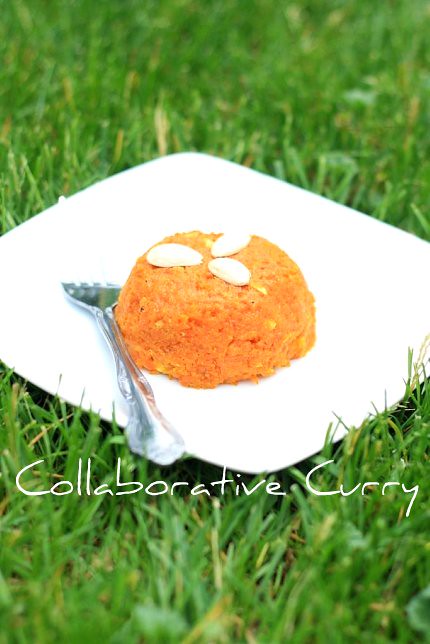
I wanted to make something special for Sunitha to wish her on her birthday and to let her know how special she is to me .So here is her favorite payasam and I would love to share this virtual treat with her and also with you all. I hope you all will join me in wishing her a very happy Birthday.

Everyone in my family likes pal payasam and I'm sure you will also love it. I am giving you the easiest and simple pressure cooker method and the original method.Believe me, both tastes the same. But it is all up to you, whether to follow the contemporary or authentic approach:-)

Ingredients:

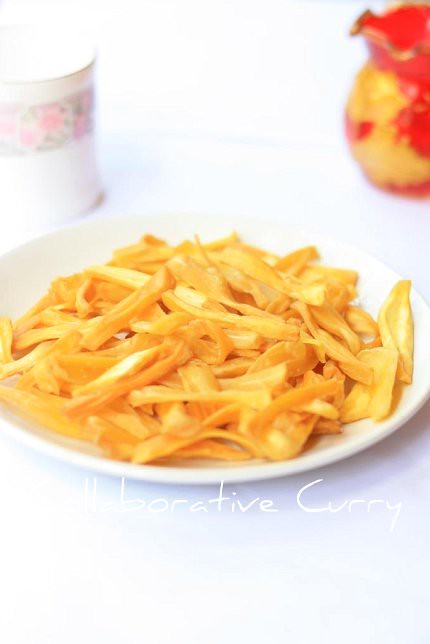
Red Rice (unakkalari) - 1/2 Cup
Milk (whole milk)- 5 Cups
Sugar- 1 Cup
Ghee (optional)- 2 tsp

Method:
In pressure cooker:

1.Clean the rice by rubbing it on a cloth.If you are a cleanliness freak, wash the rice (quickly, don't soak it even for a minute!) and dry it completely before making payasam.
2.Throw in everything together in a cooker and let it boil, without the weight on.
3.When the steam starts coming keep the weight on and reduce the heat to medium low/simmer.
4.Let it sit on this heat for about 40 minutes.(no single whistle during this time)
5.Switch off the heat and let it sit for at least 2 hours before opening and transferring the payasam to serving dish.The more you keep the more pink color you will get.


On Stove Top:

1.Clean the rice as I have explained above.
2.Heat the ghee in a thick bottom pan and trow in the rice to saute for 4-5 minutes on medium heat.
3.Add 3 cups of milk and 1 cup of water and let it boil.
4.Once the milk starts boiling reduce the heat and let the rice cook well, but not mushy.This takes about 30-40 minutes depending on the variety of rice you use.
5.When the water is almost absorbed, add the sugar and keep stirring till you get a clear path behind the spatula you use to stir.This takes about 15 minutes on medium low heat.The more the time the more tastier it will get .(Then you should keep it on medium low heat )
6.Pour the remaining milk slowly after keeping the heat on medium high and let it boil after each addition.
7..If you want to have more watery consistency then you may add more milk.


Notes:

1. The authentic recipe doesn't call for any cardamom, cashews or raisins.But feel free to use it.
2.You could replace the red rice with Basmati/Sona Masoori/Long Grain rice varieties.But you will not get the dark pink color.
3.After preparing the payasam gets thicker once it cools down. You could adjust the consistency at any time by adding boiled milk into the payasam.

Monday, July 26, 2010

Pork Curry

  I have been so out of the blog world.  My husband and I relocated to Ohio and for the last month or so decisions, waiting, biting nails and more waiting took up all the time.  Yes, I was cooking and eating and could have probably taken some pictures and blogged.  However, I was feeling frozen in place with inactivity for some absurd, inexcusable reasons.  Believing you will forgive my lack of visits to your blogs and enthusiasm in blogging generally, I have a recipe for this very tasty pork curry.

 I cannot boast of any new techniques of cooking here.  The taste is familiar and yet slight variations I made while cooking gives it a refreshing newness.  It all started when I visited a friend recently and he served an  awesome chicken curry.  I asked him how he makes it and the way he rambled along with the recipe it was all the same thing that I do. Yet, it tasted different and very good.  Some variations I gleaned from his rambings were that he had added a lot of coriander leaves and his ratio of chili to coriander powder was different from mine.  Having been reminded again how much fresh coriander leaves can break or make a dish I gave this one an abundant dose.  I am not disappointed!

Ingredients:
Pork - 2 lbs
Onion - 1 large
Ginger - 1 Tbspn
Garlic - 1 Tbspn
Potato - 1
Tomato - 1
Curd     - 2 Tbspn
Green chili - 4
Chili Powder - 1 Tbspn
Coriander Powder - 2 Tbspn
Turmeric - 1/2 tspn
Garam Masala - 1 tspn
Tejpatta/Indian Bay Leaf - 1
Coriander Leaves - 1 bunch
Salt - to taste


Method:
1. Marinate pork in curd and salt for an hour
2.. Saute onions till translucent and add green chilies, ginger and garlic and saute
3. Add chili powder, coriander powder, garam masala and turmeric
4. Add tomatoes
5. Add the marinated pork and a cup of water and pressure cook till done. (I kept it for one whistle and then lowered the fire and cooked for a while about 10 minutes
Garnish with plenty of coriander leaves and serve with rice or roti

Contributor: Sunitha

Thursday, July 22, 2010

Jackfruit Chips/ Chakka Upperi

   Jackfruits are one of the biggest blessing during humid summers in Kerala.  Loved as much as the mangoes we use this summer fruit in manifold ways to turnover scrummy dishes.  Believe me when I say this we really make use of every part.  The fruity flesh is enjoyed as is and turned into cooked sweet delicacies.  When raw we cook them fine adding chilies and coconut and make a savory side dish for rice or eat is with spicy fish curry or pickle.  Coming to the seeds it can be turned into unbelievable variety of dishes as well.  Paired with other vegetables or alone they make great dishes to be enjoyed with rice. 

  It makes me drool just writing about all the delicious stuff.  Without further ado today's recipe is the crispy fries made with the raw flesh of the jackfruit.  They are one of our favorites and while in Kerala I had a chance to make them with family.  It was a wonderful time both making and munching on them over tea and chitchat while the rain splashed away keeping pace with our own relentless chatter.  Simple pleasures of life.

  By the way, I did mean it when I said we use every part of the jackfruit.  The jagged outer husk is fed to the cattle.


Ingredients:

Raw Jackfruit(take only the edible white part)
Salt
Oil

Method:

1.Clean the raw chakkachula (edible white part)and slice it equally.Cut off both the top and bottom edges.
2.Bring the oil to smoking hot.
3.Throw in the pieces and fry till it is done. The time depends on the thickness of the pieces.
4.Add some salt water slowly into the pan ,be careful while doing so, since the oil will splutter around.If you are using a smaller pan you could cover it up, if not stay as far as you can :-)
5.Take out and spread on a paper towel and let cool before storing in an airtight container.


Here is the picture of some jackfruits from our yard ,back in Kerala.In fact when went they were almost over, though we were lucky enough to eat them in all forms.And I got to click the last remaining ones for you all :-)

Monday, July 19, 2010

Tandoori Chicken

Thanks for all your wishes to Sunitha and me.Thanks for your understanding and continued support.

Today's dish is so popular that it doesn't need any introduction.My family just love this and we make it quite often.Usually I do not add any food color,rather I would add more Kashmiri chilli powder for the color.See you all with another delicacy, soon :-)


Ingredients:

Chicken Drumsticks- 6-7
Yogurt- 4-5 Tbsp
Ginger-Garlic Paste- 1 Tbsp
Lemon Juice- 1 tsp
Pepper powder- 1/4 tsp
Red chilli powder- 1/2 Tbsp
Kashmiri chilli powder-1 Tbsp
Garam Masala- 1/2 tsp
Coriander powder- 1 Tbsp
Turmeric- a pinch
Red food color (optional)- a few drops
Salt- To taste
Oil- 1 Tbsp


Method:

1.Clean the drumsticks and remove all the water by placing them on paper towels.
2.Prepare the marinade by mixing together all the ingredients except the oil, listed.If you have time it would be great if you could take out all the water from yogurt by letting it hang in a muslin cloth for some time.
3.Make some incisions on the drumsticks and apply the marinade on each of them.
4.Finally sprinkle the oil on top and cover it, keep in the refrigerator for overnight or at least 8 hours.
5.Preheat the oven at 450 degree F.Place an Aluminum foil on a baking tray. (this would help reduce the mess).Place the drumsticks a few inches apart and spray with some oil.
6.Bake for about 30 minutes ,turning the sides in between.
7.If your oven has broil option keep it at 500 degree F, broil for 10 minutes,again turning the sides in between.If you are not broiling, keep it at 450 for another 10-12 minutes or until it is done.
8.If you have a grill, keep it on high until the chicken is done.This takes about 20-25 minutes.

Contributor: Namitha

Friday, July 16, 2010

Carrot Halwa

I thought I will start with a sweet note to say hi to all of you. God, how much I missed you all and your yummy delights. India was wonderful with rains and lots of food.Still we are unpacking and settling back to normalcy.Kids are sick and we may not be able to upload everyday for some more days. Sunitha is shifting to a new place this weekend and she needs some time to settle in. I wish her all the very best in the new place and hope she will find out some new friends soon.


Ingredients;

Grated carrot- 2 1/2 cup
Milk- 2 Cups
Sugar- 1/3 cup or to your taste
Ghee/Clarified butter- 1/4 cup
Cardamom- 1/2 tsp
Nuts- for garnishing


Method:

1.Boil the milk in a pot till it gets reduced to 1/3rd of its quantity.Stir in between while doing this.
2.Heat a non sticky pan and add the ghee, throw in the grated carrot into this and saute for a few minutes on low heat.Keep stirring for a few minutes, until the carrot is cooked. This takes around 7-8 minutes.
3.Pour the evaporated milk over this and cook ,keeping the lid on for a few minutes.
4.Add the sugar and mix well.Continue to cook for some more minutes, or until tall the water content is evaporated.
5.Sprinkle the cardamom powder and mix well.
6.Take this in a serving plate and garnish with slivered almonds or any nuts and raisins.


We are happy to send this to Nivedita's event "celebrate sweets- Halwa "
Thanks for hosting such a cool event Nivedita :-)

Contributor: Namitha