This is a recipe that has nostalgia as a main ingredient ! As a Malayalee, I love anything coconut and a chutney like this, is a part of everyday diet, back in Kerala.We have this with our breakfast, as a side for puzhukku (mashed yuca or jackfruit mostly),with our lunch (rice, thoran etc) and also with our dinner (if it is kanji aka rice porridge). I guess you got how much we, Keralaites, love these semi-dry chutneys,because they match with almost everything we eat.
Showing posts with label Vegetarian Side Dish. Show all posts
Thursday, January 12, 2012
Friday, May 6, 2011
Drumstick in thick coconut gravy
The name drumstick owes to the triangular, long seed-pods of Genus Moringa. Huh?!? I am not convinced with this etymology, but who am I to say! What I am proud of is we call it muringakay which is definitely closer to the scientific name Moringa. Full points to the Indian name of this vegetable!
Did you know that the drumstick tree is said to be one of the most useful trees on earth? Surprised? Me too! Wikipedia says “It is considered one of the world’s most useful trees, as almost every part of the Moringa tree can be used for food or has some other beneficial property.” This is phenomenal. So, let’s not waste any more time, but jump straight in- to learning how to cook this vegetable.
This curry is generally made with drumsticks and mango, where mango gives the tartness. I did not have any handy, so decided to make it without, and what do you know – not bad! Obviously the tartness is missing, but the addition of jeera, and a generous amount of cloves, packs the curry with enough flavor. A mango pickle to go with it will be perfect.
Ingredients:
Drumsticks – 14, 2-inch pieces
Thai Green Chilies – 4
Turmeric – 1/2 tspn
Chili Powder - 1/2 tspn
For Grinding
Coconut – 1 cup
Jeera – 1 tspn
Garlic Cloves - 4
Tempering
Coconut oil – 2 Tbspn
Shallots – 3
Curry Leaves – 1 sprig
Dry red chilies – 2 broken into 4 pieces
Method:
1. Cook drumsticks in 1 cup or enough water to immerse them together with turmeric, ¼ tspn salt and green chilies. Cooked to done but not falling apart. That will be about 10 minutes. Note that I have used frozen drumsticks.
2. Grind coconut, jeera and garlic cloves to a fine paste, and add to the cooked drumsticks. Use water to make a thin or thick gravy to your preference. Take the pan off the heat as soon as the curry heats through. Check for salt and add to taste.
3. Heat coconut oil in a small pan splutter the mustard. Follow it with shallots, red chilies, and curry leaves, and pour over the curry.
Serves: 4
Serve with rice.
Tuesday, April 26, 2011
Artichoke
Artichokes were my perennial curiosity. I would see them on shelves in stores - hold them, ponder about how the hell to cook it, see the price, and walk away. Well, if I am paying all that money, I need to know I can cook it, and what I cook will be edible. Fair enough? A couple of weeks ago I let go of reason, and picked up a few. After all, the internet is an oasis of information. I was not wrong. I found simply recipes where she beautifully gives step-by-step version of cooking, as well as eating artichokes. I followed her method to a tee.
It is rather simple once you know how to go about it. The taste is difficult to explain, but similar to somewhere around the area of peas, avocado, etc. I think. A rich vegetable protein is the best I can do. You can read about artichokes in wikipedia here
It is described as a perennial thistle, and I couldn't help but smile. My second year in Tennessee, a friend and I drove down to Mississippi on the Natchez Trace. Fantastic times! Both of us being wild flower enthusiasts, we closely looked out for them, and sighed 'oohs and aahs' at every spotting - including dandelions and thistles too. My friend, Marilyn, would forgive me liking dandelions, but when it came to thistles I had something else coming. The minute I started photographing them, she would say with fervor - repeatedly, constantly "it is a weed, a farmer's nightmare!" Otherwise excited about stopping for pictures - if my target were thistles, she would not be budged. Apparently, in her gardening days, she said she had ghastly experiences trying to weed these, and she hated it with passion. It is kind of a joke between us - how I like thistles, and how she hates them. She now sends me birthday cards with thistle pictures on it :)
Therefore from thistles to artichokes, it's a love that cannot be explained. I love the way they look. I guess it's time to send Marilyn a card picturing an artichoke!
Ingredients:
Artichoke – 2
Bay Leaf – 1
Garlic – 2- 3 pods
Lemon – 1
Salt – to taste
Method:
1. Chop off the pointed end of artichoke globe and rub lemon juice to avoid blackening while you work on the scales
2. Snip off the pointed edge of each scale and boil it in enough water with bay leaf, garlic, lemon juice and salt
3. Once cooked you can eat the fleshy end of each leaf/scale. When you get to the heart of the globe, the base is covered with hairy choke which should be spooned off before you enjoy the fleshy base.
4. You can dip it in mayonnaise and enjoy.
5. It took me about 45 minutes to cook.
Labels:
Gluten-free,
Vegetarian Side Dish
Thursday, April 14, 2011
Kurukku Kalan/Boiled and Thickened Yogurt gravy & Happy Vishu
I have shared many stories about Vishu on this site and you can read about it here. For me, the best thing about Vishu, as a grown up, is the fresh morning after a rain because it always rains in Kerala during this time. The smell of fresh earth, the lush green scenery outside, and to wake up looking at a beautifully decorated room with pictures of my favorite gods, light from an oil lamp and oodles of yellow flowers. Tell you what - it’s a fantastic way to kick start a day!
My experience here in US this year will be kind of similar because it's been raining here. The rain is setting the stage for me to experience all of the above. There may be less green, but overall I am feeling very good about it this year, and in some ways I will experience my hometown here in the US too. The daffodils, dandelions and tulips have already started showing off their vibrant colors. I will miss konnapoo, but these flowers in my yard are a great stand by. I will decorate a 'vishukkani" with some of these flowers and the "Krishnan" I got from Guruvayur. Here is a picture from last year, and the first look I will have tomorrow will be the same.
The recipe for today in celebration of this festival is Kurukku Kalan - a part of the ‘sadya.’ I promised to post it here long back, but couldn't do it until now. Kalan is often confused with "pulissery", because the basic ingredients are the same. However, kalan is made after boiling and thickening the yogurt, which is more delicate and time consuming when compared to pulissery. But I must tell you, all the efforts are worth it, if you like this dish. Here is a recipe from both my families, mine and my in-laws. The variations will be clear to you from my notes at the end.
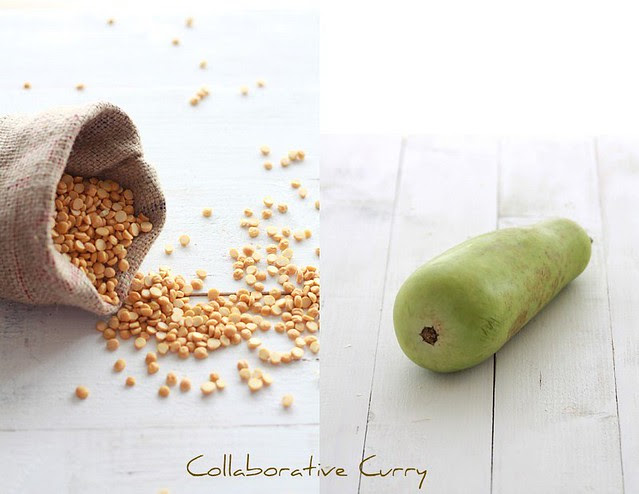
Collaborative Curry wishes it's readers a very Happy Vishu/ Tamil New year to all.
Ingredients:
Coconut oil- 2 tsp
Mustard seeds- 1/4 tsp
Green Chillies,slit in the middle- 3-4
Raw Banana(Nendran)/Elephant foot yam(chena),cubed- 1/3 cup
Turmeric powder- 1/4 tsp
Red chili powder- a pinch
Salt- to taste
Sour Curd/yogurt- Half liter/~500g
Coconut grated- 3 Tbsp
Cumin seeds/Jeera- 1/4 tsp
Dry roasted and powdered Methi/Fenugreek seeds- a big pinch
For Seasoning:
Coconut oil- 2 tsp
Mustard seeds- 1/4 tsp
Dried red chilies, broken into halves- 2
Curry leaves- 1 sprig
Method:
1. Peel off the banana skin and chop into 1/4 inch pieces.
2. Grind the coconut with the cumin seeds to a fine paste, without adding any or very little water and transfer it into a small pan/plate. (Keep this close at hand while cooking the vegetable in the following step.)
3. Beat the yogurt/curd well and do not add any water.
4. Heat 2tsp of coconut oil in a deep, thick bottom pan. Add the slit green chilies and sauté till it changes color, at medium-low-heat.
5. Reduce the heat or take out the pan from the stove and add the turmeric powder and chili powder and mix well. Care should be taken not to burn.
6. Bring the pan back over the stove or increase the heat and add a cup of water (enough water to cook the vegetable). Slide in the chopped banana/yam and mix well. Bring to a boil. Reduce the heat and continue to cook. This took about 20 minutes for me.
7. When the vegetables are cooked and yield to a fork add salt and mix slowly without mashing the vegetables. Boil all the water dry.
8. Add beaten curd/yogurt and stir well. Bring the mixture to a boil while stirring continuously.
9. Once it starts to boil, reduce the heat to medium and continue to stir.
10. Foam starts forming at this point. Spoon it out and pour over the ground-coconut mixture you should have handy at the side. This process helps the coconut to be lightly cooked. Set the coconut mixture aside and continue to stir the yogurt.
11. In about 20 – 30 minutes the yogurt will start to thicken. Now, add the coconut mixture with the foam you collected and mix well and heat through.
13. Switch off the heat. Be careful not to heat the mixture after adding the coconut mixture or else it will curdle.
14. Remove the pan from the stove, sprinkle the methi powder and mix well.
15. For seasoning; take a small pan and heat the oil. Splutter the mustard seeds and add the red chilies. Switch off the heat and add the curry leaves. Pour this over the kalan.
Notes:
1. You can use yam or raw banana (nendran) for making this. If you don't have any of the vegetables it is fine. Avoid the cooking step for vegetables and start with cooking the yogurt.
2. My sis-in-law (fantastic cook) uses slightly ripened banana (nendran) for making kalan, especially if the curd is sour. The sour-sweet combo is good.
3. When the yogurt mixture starts thickening, you have to decide about the consistency of the end product. If you like a pouring consistency you can stop a little earlier than I have mentioned. Remember, adding the coconut mixture will thicken the curry and once it cools down it thickens further. Therefore decide on the consistency early on in the cooking. I like to make kalan thick and that is how I have timed and measured my recipe.
4. You may avoid adding coconut mixture for this curry. If so, the curry can be kept at room temperature for longer. For weeks! Alternatively, the coconut mixture can be added in small portions on the days you serve this. However, you may add coconut like I have given in the method and the curry will keep for several days in the refrigerator.
5. If you are not adding coconut mixture you can add cumin powder and mix into the beaten yogurt. This method is mostly preferred by cooks while making large quantities for sadya. Like I have already mentioned, the adding and deleting of coconut mixture is for more than the taste, is to prolong the shelf life of this curry.
6. If you think that your curd/yogurt is not sour enough (especially when you have store-bought yogurt) leave it on the counter top overnight. This will definitely make the yogurt sour. Obviously!
Contributor: Namitha
Saturday, April 9, 2011
Kadai Vegetable
Indian cuisine is rich with vegetarian curries. But sometimes you get so used to making the same old sambar and rice it is an effort to break away and embrace variety. Also, when you try to incorporate different cuisine there is only so much one can make and eat, right? Everything said and done, today I decided it was about time to spin something different and put together a vegetable curry.
The subject of gravies as far as I can see can be contented. What goes into a korma as against a kadai? A korma can have cashews and cream while a 'kadai' will not. And if you are from the South of India then you probably make the korma with coconut gravy. Therefore, if one of you feel that this recipe has too many cashews for a kadai curry you are probably right. But I like a rich gravy and added a generous portion.
Spicy hot curry.
Ingredients:
Beans – 20
Carrot – 2
Bell Pepper – ½
Tomato – 1 medium
Onions – 1/2 of one large onion
For Gravy:
Cashew nuts - 25
Dry Chili - 6
Onions - 1/2 chopped fine
Ginger - 1/2 inch piece chopped fine
Garlic - 5 or 6 pods chopped fine
Tomato - 1 medium
Chili Powder - 1/2 tspnTomato - 1 medium
Turmeric - 1/2 tspn
Coriander Powder - 2 tspn heaped
Kasturi Methi - 1 pinch
Tamarind - 1 marble size ball soaked in about 1/2 cup water
Oil - 2 - 3 Tbspn
Method:
Preparing the Vegetables:
1. Boil about a cup of water and slide in the carrots and beans. When they are tender and yet crisp remove using a slotted spoon from the broth and set aside. Reserve broth for later.
2. Line a cookie sheet and place the capsicum, onions and tomato and broil on hi for about 15 minutes. Alternately, in a skillet heat about a teaspoon of oil and on high saute onions, tomato and capsicum one at a time till the edges of the vegetables are browned. Remember to keep all the vegetables crisp, never over cooked.
For Gravy:
1.Fry cashews in a tablespoon of oil until golden brown and spoon it out to cool
2. In the same oil fry the dry chilies making sure you don't burn it. You will get a distinct smell of fried chilies when you can slot it out to join the cashews.
3. Add another tablespoon of oil to the pan, and saute ginger, garlic and onions till onions are golden brown.
4. Add turmeric, chili and coriander powder and saute until the fresh smell of coriander turns aromatic.
5. Add tomato and saute until all of the tomato blends in to a pulp.
6. Cool this mixture and make a paste using a blender.
7. Bring it back into the same pan and cook until oil clears the pan.
8. Add tamarind juice and salt to taste. Add the vegetable broth to adjust the consistency of the gray. Make sure to use only as much tamarind juice as you need.
9. Powder kasturi methi between your palms and add to the gravy.
10. Once the mixture boils add all the vegetables, mix and let it heat through.
11. Serve hot with rotis or jeera rice.
Notes:
1. Peas, cauliflower and mushrooms go well for this curry. I have just used what I had on hand but if you are making for a party you will definitely want to add these vegetables like most restaurants serve.
Notes:
1. Peas, cauliflower and mushrooms go well for this curry. I have just used what I had on hand but if you are making for a party you will definitely want to add these vegetables like most restaurants serve.
Contributor: Sunitha
Monday, March 28, 2011
Asparagus and Sweet Pepper Roasted
Who said vegetarian has to be boring? Maybe nobody did, but sometimes I sure feel like it is. For example, this morning , my brain just couldn’t process any new ideas for a vegetarian meal. Therefore, I decided to have coke and chips for lunch. (Terrible, I know!!) Having settled on that, I proceeded to photograph raw vegetables and fruit, which is my latest interest. Everything was going well until my stomach decided to groan its displeasure. I kept going on with my business and ignored my stomach completely. Finally, when photography started frustrating me and my stomach was not letting up, my brain processed an idea. I grabbed all the asparagus I was photographing and snapped off its end. It was going into the oven.
As I bent over to replace half of the asparagus, which is for another recipe, I spotted the sweet peppers. Grabbed some, washed, and added it to the asparagus. And then, sprinkled sea salt, a generous amount of pepper and olive oil over the vegetables and picked up the cookie sheet. Lined it with foil and dropped the oil bathed vegetables on it. Feeling a little whimsical, I threw in a couple slices of lime. Cranked up the oven to 425 D F, waited for about 10 minutes to let it heat up, and then slid the cookie tray laden with veggies in. Baked for 10 minutes and I picked out the asparagus and placed on a platter. Turned the oven setting to broil and charred both sides of the pepper, takes only a few minutes on both sides.
As they all came out of the oven and was placed on a platter, I topped it with a handful of cheddar cheese and let it melt. Grabbed my glass of water melon juice and have to say enjoyed a fantastic lunch. No more groaning stomach but a blissful siesta invites me.
All is well in this part of the world, hope yours is too.
Ingredients:
Asparagus – 20
Sweet Pepper – 8
Pepper – to taste
Sea Salt – to taste
Olive Oil – 1 Tbspn
Cheddar Cheese – to taste
Method:
1. Snap the ends of the asparagus and place it on a cookie sheet lined with foil
2. Add the sweet peppers
3. Sprinkle pepper, salt and drizzle the olive oil over.
4. Bake at 425 D F for about 10- 12 minutes. Remove the asparagus into a plate.
5. Change the oven setting to broil and blacken both sides of the pepper about a minute or two on both sides.
6. Place the peppers in the serving plate and sprinkle cheddar cheese over and let it melt
This is not an original idea, of course you know that. I am just saying I just decided to eat this as lunch which is new for me.
Contributor: Sunitha
Labels:
Gluten-free,
Vegetarian Side Dish
Monday, March 21, 2011
Lauki aur Chana Dal/ Bottle Gourd and Split Chick Peas Curry
Curry has to be lip-smacking good. When I first tried bottle gourd though, I did not get that impression. The decision was instant to never try it again. Then something wonderful happened, and I had some exquisitely- made lauki aur chana dal. Well, not exquisite because it was too salty, but the potential with this vegetable was clear. I did not lose any time. I bought some bottle gourd and made some myself. Yum! Light, delectable, easy dish, I should say. I read some recipes online and checked with friends who have cooked them before and I knew what I had to do. The curry is so good, that if you are not careful, you will never get to eat it with rotis or rice because you would already have had it as soup. Mmm…!

I am kind of enjoying the vegetarian dishes I am trying these days. Next in line is something to do with spinach and hopefully it will turn out well. Other than food, I am still waiting for spring, and in the mean time, I am tinkering with craft projects like making gunny bags, as you can see in the second picture. I have totally lost it! Over the weekend, I moseyed around some culinary stores like Crate and Barrel , and got an eyeful of designs, textures and possibilities for photography. How far I will succeed in transitioning this idea from my mind to my computer has yet to be seen. While I try and grasp my fingers around these trivial things, you make some curry and enjoy it with warm rice or hot rotis.


Ingredients:
Bottle Gourd – 1 small (about 3 cups when chopped)
Chana Dal - ½ cup (soaked for 2 hours)
Oil – 1 Tbspn
Asafoetida (Hing) – a pinch
Cumin Seeds – ½ tspn
Turmeric Powder – ¼ tspn
Onions - 1 medium chopped fine
Green Chilies - 4 chopped
Tomato - 1 or 2 chopped (depending on the kind of tomato. If it’s Roma then use 2 and plum tomato on the vine use just 1)
Coriander Powder – 2 tspn
Chili Powder - 1 tspn
Coriander Leaves – a small bunch
Garam Masala – ½ tspn
Lemon Juice of ½ a lemon
Method:
1. Clean and cook chopped bottle gourd and chana dal in a pressure cooker for 1 whistle. Pressure cookers differ, so make sure you cook the dal so that it retains it’s shape .
2. Heat oil in a pot which can hold all the curry. Start by adding asafetida and then splutter the cumin seeds. Follow these with onions and green chilies.
3. Once the onions are translucent, add turmeric, coriander powder and chili powder. Fry until you get the cooked aroma of the powder, about a minute of frying should do.
4. Add tomatoes and sauté. Once it’s cooked, about 2 or 3 minutes, add cooked dal and bottle gourd. If you like the texture of this curry to be thick gently mash part of the vegetables and leave the rest to retain its shape.
5. Add water depending on desired consistency.
6. Tip in a ½ tspn of garam masala, mix and garnish with coriander leaves
7. Serve hot with rice or rotis.
Contributor: Sunitha
I am kind of enjoying the vegetarian dishes I am trying these days. Next in line is something to do with spinach and hopefully it will turn out well. Other than food, I am still waiting for spring, and in the mean time, I am tinkering with craft projects like making gunny bags, as you can see in the second picture. I have totally lost it! Over the weekend, I moseyed around some culinary stores like Crate and Barrel , and got an eyeful of designs, textures and possibilities for photography. How far I will succeed in transitioning this idea from my mind to my computer has yet to be seen. While I try and grasp my fingers around these trivial things, you make some curry and enjoy it with warm rice or hot rotis.
Ingredients:
Bottle Gourd – 1 small (about 3 cups when chopped)
Chana Dal - ½ cup (soaked for 2 hours)
Oil – 1 Tbspn
Asafoetida (Hing) – a pinch
Cumin Seeds – ½ tspn
Turmeric Powder – ¼ tspn
Onions - 1 medium chopped fine
Green Chilies - 4 chopped
Tomato - 1 or 2 chopped (depending on the kind of tomato. If it’s Roma then use 2 and plum tomato on the vine use just 1)
Coriander Powder – 2 tspn
Chili Powder - 1 tspn
Coriander Leaves – a small bunch
Garam Masala – ½ tspn
Lemon Juice of ½ a lemon
Method:
1. Clean and cook chopped bottle gourd and chana dal in a pressure cooker for 1 whistle. Pressure cookers differ, so make sure you cook the dal so that it retains it’s shape .
2. Heat oil in a pot which can hold all the curry. Start by adding asafetida and then splutter the cumin seeds. Follow these with onions and green chilies.
3. Once the onions are translucent, add turmeric, coriander powder and chili powder. Fry until you get the cooked aroma of the powder, about a minute of frying should do.
4. Add tomatoes and sauté. Once it’s cooked, about 2 or 3 minutes, add cooked dal and bottle gourd. If you like the texture of this curry to be thick gently mash part of the vegetables and leave the rest to retain its shape.
5. Add water depending on desired consistency.
6. Tip in a ½ tspn of garam masala, mix and garnish with coriander leaves
7. Serve hot with rice or rotis.
Contributor: Sunitha
Labels:
Chana Dal,
Gluten-free,
Vegetarian Side Dish
Friday, March 18, 2011
Bok Choy and Portabella Mushrooms
I read some methods of cooking bok choy, and then decided to mix it up with some portabella mushrooms. I have to say I was not disappointed. I am skeptical about buying new vegetables and trying them at home. Alternatively, if it’s from a restaurant, I am more receptive. Since Chinese cuisine is one of my favorites, I decided to go out and pick up some Chinese cabbage, fancy mushrooms, and sprouts. So the first one to make the list was bok choy, and I am glad about this decision.

Sautéing was the first option, but then I added some vegetable stock to make it wet. I like this since I can eat it even with plain rice. It will also be a great accompaniment with a meat dinner.

When trying new vegetables or meats, I try to stick with familiar flavors to begin with. Even though pairing every vegetable or meat with the same flavor may not be the right approach, when it’s Chinese cuisine I hope you will agree ginger and garlic won’t be too wrong. Also, ginger and garlic is a personal favorite so I decided to go all out and try.

Bok choy and mushrooms flavored with soyabean sauce, chilies, ginger and garlic. I hope you will enjoy this simple dish. A simple dish, but the earthy mushrooms and bok choy will make you forget how simple, and every mouthful will be a delight. I have used portabella mushrooms, which according to me, is far superior in taste from the regular white ones.
This dish is spicy hot!
Ingredients:
Baby Bok Choy - 5, split in two
Baby Portabella Mushrooms - 20, split in two or four
White vinegar - 2 Tbspn
Water - 2 Tbspn
Dry Red Chilies - 6
Garlic - 3 – 4 cloves
Ginger - ½ inch piece
Shallots - 2
Soya Bean Sauce - 2 Tbspn (you may add more if you want to make the taste prominent)
Vegetable Stock - ¼ cup
Oil - 1 Tbspn
Salt - to taste
Sesame Seeds - 1 tspn or if you like more you may toast and add 2 tspn full.
Method:
1. Mix white vinegar and water in a small bowl
2. Soak chilies, ginger and garlic in this mixture for at least an hour
3. Drain and grind this to a coarse paste with a pestle and mortar
4. Heat 1 Tbspn of oil in a wok or pan wide enough to stir the bok choy and mushrooms
5. Add the ground mixture and stir for a minute or two or until the chilies and garlic release their cooked aroma. Add bok choy and mushrooms and sauté
6. When edges of the bok choy turn light brown, add soyabean sauce and stir for a minute
7. Add vegetable stock, close and cook till bok choy is tender. This will not take long since we have already sautéed the vegetables.
8. Toast sesame seeds and sprinkle before serving.
Contributor: sunitha
Sautéing was the first option, but then I added some vegetable stock to make it wet. I like this since I can eat it even with plain rice. It will also be a great accompaniment with a meat dinner.
When trying new vegetables or meats, I try to stick with familiar flavors to begin with. Even though pairing every vegetable or meat with the same flavor may not be the right approach, when it’s Chinese cuisine I hope you will agree ginger and garlic won’t be too wrong. Also, ginger and garlic is a personal favorite so I decided to go all out and try.
Bok choy and mushrooms flavored with soyabean sauce, chilies, ginger and garlic. I hope you will enjoy this simple dish. A simple dish, but the earthy mushrooms and bok choy will make you forget how simple, and every mouthful will be a delight. I have used portabella mushrooms, which according to me, is far superior in taste from the regular white ones.
This dish is spicy hot!
Ingredients:
Baby Bok Choy - 5, split in two
Baby Portabella Mushrooms - 20, split in two or four
White vinegar - 2 Tbspn
Water - 2 Tbspn
Dry Red Chilies - 6
Garlic - 3 – 4 cloves
Ginger - ½ inch piece
Shallots - 2
Soya Bean Sauce - 2 Tbspn (you may add more if you want to make the taste prominent)
Vegetable Stock - ¼ cup
Oil - 1 Tbspn
Salt - to taste
Sesame Seeds - 1 tspn or if you like more you may toast and add 2 tspn full.
Method:
1. Mix white vinegar and water in a small bowl
2. Soak chilies, ginger and garlic in this mixture for at least an hour
3. Drain and grind this to a coarse paste with a pestle and mortar
4. Heat 1 Tbspn of oil in a wok or pan wide enough to stir the bok choy and mushrooms
5. Add the ground mixture and stir for a minute or two or until the chilies and garlic release their cooked aroma. Add bok choy and mushrooms and sauté
6. When edges of the bok choy turn light brown, add soyabean sauce and stir for a minute
7. Add vegetable stock, close and cook till bok choy is tender. This will not take long since we have already sautéed the vegetables.
8. Toast sesame seeds and sprinkle before serving.
Contributor: sunitha
Labels:
bok choy,
mushrooms,
Vegetarian Side Dish
Friday, March 11, 2011
Spinach Dal
Dal curry awakens fond memories from my early days of marriage. Yes, I know that I have talked about this on our site before. When I write about dal curry, it’s difficult not to mention my Telugu friend and colleague from Hyderabad who made a mean dal curry - so to speak. Though a little too spicy, it was delicious!. Being unable to eat as much as I would like with the heat, I asked her once how many chilies she put in the curry and she said “a handful.” Wow! No wonder, I would exclaim. It was a joke between us how much I would still eat in spite of the heat in the curry. I have learned a lot from her, and when I started cooking this curry myself she would caution me - you better go easy on the chilies having a kid at home!

Dal, in most Indian cuisines, is a side dish that goes both with rice and roti. As most dishes, it is cooked differently from state to state. However, it is a must have in a ‘Thali.’ My mouth waters whenever I think of a good lunch thali from my favorite vegetarian restaurant. I have tried to recreate some of that magic with this dish myself and hope you will enjoy it too.


Ingredients:
Tur Dal/Tuvar/Toor daal- ~1 cup
Tomato- 1 chopped finely
Turmeric Powder- 1/4 tsp
Salt- to your taste
Spinach- one bunch,chopped
Tamarind pulp- from a lime sized ball or to your taste
Tempering:
Oil- 1 Tbsp
Mustard seeds- 1/4 tsp
Chana dal- 1 tsp
Red chilies, broken into halves- 3
Garlic grated- 1 1/2 tsp
Red chili powder- 1/2 tsp
Method:
1. Pressure-cook all the ingredients listed, except for tempering and set aside.
2. Heat oil in a pan, add the mustard seeds and let it splutter. Follow it with chana dal and when it changes color to a light brown, add the grated garlic and red chilies. Saute` until the raw smell leaves.
3. Switch off the heat and add chili powder. Keep stirring until the chili powder is heated through. Be careful not to burn the chili powder. Pour the tempering over the cooked dal and mix.
4. Serve with rice.
Notes:
1. You can add green chilies when you cook the dal, and skip adding the red chili powder in the tempering.
2. For the amount of dal given in this recipe, 3-4 green chilies would make the dish medium hot (spicy).
3. Sometimes, I cook the dal with salt and turmeric and add the remaining ingredients along with the tempering - sautéing after each addition until they are all cooked and mix into the dal.
Sending this to My Legume Love affair at Ammalu's Kitchen,barinchild of Susan from The well seasoned cook
Contributor: Namitha
Dal, in most Indian cuisines, is a side dish that goes both with rice and roti. As most dishes, it is cooked differently from state to state. However, it is a must have in a ‘Thali.’ My mouth waters whenever I think of a good lunch thali from my favorite vegetarian restaurant. I have tried to recreate some of that magic with this dish myself and hope you will enjoy it too.
Ingredients:
Tur Dal/Tuvar/Toor daal- ~1 cup
Tomato- 1 chopped finely
Turmeric Powder- 1/4 tsp
Salt- to your taste
Spinach- one bunch,chopped
Tamarind pulp- from a lime sized ball or to your taste
Tempering:
Oil- 1 Tbsp
Mustard seeds- 1/4 tsp
Chana dal- 1 tsp
Red chilies, broken into halves- 3
Garlic grated- 1 1/2 tsp
Red chili powder- 1/2 tsp
Method:
1. Pressure-cook all the ingredients listed, except for tempering and set aside.
2. Heat oil in a pan, add the mustard seeds and let it splutter. Follow it with chana dal and when it changes color to a light brown, add the grated garlic and red chilies. Saute` until the raw smell leaves.
3. Switch off the heat and add chili powder. Keep stirring until the chili powder is heated through. Be careful not to burn the chili powder. Pour the tempering over the cooked dal and mix.
4. Serve with rice.
Notes:
1. You can add green chilies when you cook the dal, and skip adding the red chili powder in the tempering.
2. For the amount of dal given in this recipe, 3-4 green chilies would make the dish medium hot (spicy).
3. Sometimes, I cook the dal with salt and turmeric and add the remaining ingredients along with the tempering - sautéing after each addition until they are all cooked and mix into the dal.
Sending this to My Legume Love affair at Ammalu's Kitchen,barinchild of Susan from The well seasoned cook
Contributor: Namitha
Labels:
Gluten-free,
Taste of Andhra,
Toor Daal,
Vegetarian Side Dish
Tuesday, March 1, 2011
Breadfruit/Kadachakka Thoran
Collaborative curry was on a roll last weekend. We were featured in the prestigious Hindu Newspaper. Huh! Can you imagine the thrill. We are mighty pleased and want to thank you all for supporting and being there to cheer us on.If you haven't got a chance to take a peek, here is a link A special thanks to Rachel of Tangerine's Kitchen, the lovely lady who brought the published feature to our attention.

Mostly, the news paper highlighted our Kerala Cuisine and we are proud of it. I decided there is no better way to concur with this sentiment than to give you one more of our favorite recipe from Kottayam. This recipe is Namitha's, but since I got access to frozen breadfruit before her, I cooked it. It is quite different from the regular thoran but very good by its own right.
Ingredients:
Bread Fruit - 1 Lb
Shallots - 2 nos
Coriander Powder - 2 tspn or to taste
Chili Powder - 1 tspn or to taste
Turmeric Powder - 1/2 tspn
Coconut - 1/3 rd Cup
For tempering:
Mustard - 1/2 tspn
Shallots,finely chopped- 2
Curry Leaves - 1 sprig
Dry red chilies - 3 broken
Method:
1. Cook the breadfruit with water at par with the vegetables in the pot.
2. The cooking time for the breadfruit varies. Check frequently to make sure it does not overcook.
3. Once the vegetable is almost cooked add coriander powder, chili powder, turmeric powder and cover the vessel
4. Give the coconut and shallots a whirl in your mixer to lightly crush
5. Add this mixture and salt and stir
6. Temper in coconut oil or oil of preference. (Heat oil, add mustard and wait till it splutter, follow up with shallots, curry leaves and dry red chilies and when they are fried and aromatic pour over the vegetable)
7. Serve it with rice and curry
Note:
1. Bread fruit like I mentioned earlier have varied cooking time and some time you might have to pressure cook it.
Contributor: Sunitha
Labels:
Authentic,
Gluten-free,
Kerala Dishes,
Naadan,
Vegetarian Side Dish
Tuesday, January 25, 2011
Mixed Veggies Thoran
Today, I have a simple recipe of a 'thoran' for you. As you can see I got a little excited about the photography even though this is a simple recipe, then again, isn't presentation vital in cooking? A good time to make recipes like this is when you don't have enough of one vegetable but have an assorted little of many. Really, thats what I did! Mixed up this and that to make a thoran and I really loved this combination.
Have fun!

Did you like the broccoli tree with carrot flowers? My kids did ;-)

A great way to use up the leftover veggies in your fridge

Ingredients:
Broccoli Florets,cut into small- 1/2 cup
Carrots grated- 1/4 cup
Beans ,chopped finely- 1/4 cup
Cabbage ,chopped finely- 1/4 cup
Coconut Grated- 1/3 cup
Green Chillies- 3-4
Turmeric Powder- a pinch
Salt- To taste
For seasoning:
Shallots, chopped finely- 2-3
Mustard seeds- 1/4 tsp
Dried Red chillies- 2-3
Curry Leaves- 1 sprig
Oil- 2 tsp
Method:
1.Make all the veggies ready for thoran, by cutting them like I've mentioned above.
2.It's up to you whether to grate or cut the broccoli florets.
3. Grind(not much-maybe for a couple of seconds) coconut and green chillies together. If you do not have a grinder/small bowl for your mixer grinder, leave this step and just add more green chillies slit into halves.
4.Heat oil in a pan and splutter mustard seeds followed by rice.
5.Add sliced shallots and saute it till golden brown.
6.To this add red chillies and curry leaves and saute .
7.Add the Broccoli and beans along with, turmeric, salt and coconut mix from step 3 and add into the pan.
8.Mix everything together and cover the pan.Add a couple of spoon full of water.
9.Cook on medium flame for about 5-6 minute.Open and stir everything well.Add the carrots and cabbage now. Continue cooking till all the veggies are cooked, but still a bit crunchy
10.Open the pan and cook till the thoran is free of any water by stirring in between.
Have fun!
Did you like the broccoli tree with carrot flowers? My kids did ;-)
A great way to use up the leftover veggies in your fridge
Ingredients:
Broccoli Florets,cut into small- 1/2 cup
Carrots grated- 1/4 cup
Beans ,chopped finely- 1/4 cup
Cabbage ,chopped finely- 1/4 cup
Coconut Grated- 1/3 cup
Green Chillies- 3-4
Turmeric Powder- a pinch
Salt- To taste
For seasoning:
Shallots, chopped finely- 2-3
Mustard seeds- 1/4 tsp
Dried Red chillies- 2-3
Curry Leaves- 1 sprig
Oil- 2 tsp
Method:
1.Make all the veggies ready for thoran, by cutting them like I've mentioned above.
2.It's up to you whether to grate or cut the broccoli florets.
3. Grind(not much-maybe for a couple of seconds) coconut and green chillies together. If you do not have a grinder/small bowl for your mixer grinder, leave this step and just add more green chillies slit into halves.
4.Heat oil in a pan and splutter mustard seeds followed by rice.
5.Add sliced shallots and saute it till golden brown.
6.To this add red chillies and curry leaves and saute .
7.Add the Broccoli and beans along with, turmeric, salt and coconut mix from step 3 and add into the pan.
8.Mix everything together and cover the pan.Add a couple of spoon full of water.
9.Cook on medium flame for about 5-6 minute.Open and stir everything well.Add the carrots and cabbage now. Continue cooking till all the veggies are cooked, but still a bit crunchy
10.Open the pan and cook till the thoran is free of any water by stirring in between.
Wednesday, December 8, 2010
Braised Mustard Greens
Braise - to cook (meat, fish, or vegetables) by sautéeing in fat and then simmering slowly in very little liquid. (Courtesy; dictionary.com)
If you live in the Southern states of the US., you will be familiar with cooked greens, braised in bacon fat. I used mustard greens to mimic this at home, but with chicken stock. It's simple and a nice accompaniment with baked or fried chicken and mashed potato.What a comfort food during winter days !!

If anyone is wondering how mustard green looks, I hope this will help.

Try adding peppered vinegar to spike up the heat.

Ingredients:
Mustard Greens - 1 bunch
Chicken Stock - 1/2 cup
Oil - 2 tspn
Onions - 1/2 or 1 small
Garlic - 2 cloves
Black Pepper powder - to taste
Salt - to taste
Vinegar - 1 or 2 tspn or as per your taste
Method:
1. Wash and drain the leaves and tear them into pieces or chop. I have bunched them and chopped them close
2. Heat oil in a pan which will take the volume of the cut leaves
3. Saute onions and garlic and add the leaves
4. Toss around or stir as possible for a minute or two and then add the chicken stock.
5. If you don't care about the color of the leaves you can cook them covered. I tend to keep them open to retain color if possible
6. You should be cooking this at the lowest heat on your stove. Slow cooking is needed for about 10 to 15 minutes.
Notes:
1. These leaves burn your eyes like when you chop onions
2. If you are into greens then you will enjoy eating it as it is or else this is a good accompaniment with grilled, braised, baked, deep fried meat with mashed potato.
3. You can do this kind of cooking with turnip greens, collard greens, kale etc.
Contributor: Sunitha
If you live in the Southern states of the US., you will be familiar with cooked greens, braised in bacon fat. I used mustard greens to mimic this at home, but with chicken stock. It's simple and a nice accompaniment with baked or fried chicken and mashed potato.What a comfort food during winter days !!
If anyone is wondering how mustard green looks, I hope this will help.
Try adding peppered vinegar to spike up the heat.
Ingredients:
Mustard Greens - 1 bunch
Chicken Stock - 1/2 cup
Oil - 2 tspn
Onions - 1/2 or 1 small
Garlic - 2 cloves
Black Pepper powder - to taste
Salt - to taste
Vinegar - 1 or 2 tspn or as per your taste
Method:
1. Wash and drain the leaves and tear them into pieces or chop. I have bunched them and chopped them close
2. Heat oil in a pan which will take the volume of the cut leaves
3. Saute onions and garlic and add the leaves
4. Toss around or stir as possible for a minute or two and then add the chicken stock.
5. If you don't care about the color of the leaves you can cook them covered. I tend to keep them open to retain color if possible
6. You should be cooking this at the lowest heat on your stove. Slow cooking is needed for about 10 to 15 minutes.
Notes:
1. These leaves burn your eyes like when you chop onions
2. If you are into greens then you will enjoy eating it as it is or else this is a good accompaniment with grilled, braised, baked, deep fried meat with mashed potato.
3. You can do this kind of cooking with turnip greens, collard greens, kale etc.
Contributor: Sunitha
Labels:
Gluten-free,
Greens,
Vegetarian Side Dish
Monday, December 6, 2010
Kashmiri Dum Aloo/ Baby potatoes in spicy yogurt gravy
I love this time of year, wherever I am! I think everything about the season is delightful - the smells, the lights, the people, the shopping, the rush, the food, the festiveness and on and on.
We finally put up some lights outside along the door and the railings as part of our Christmas decorations, and there is still more to do, but that will be for next weekend. How about you? Do tell me where you are with your decorations and cooking, etc. for the season.
Talking of festive food, today I am sharing a delicious preparation with potato which will have your guests drooling. The first time I had this a zillion years ago at a friends place for Diwali, I distinctly remember how everybody was raving about this dish. I sang my own tune of appreciation to her, and I can still feel the taste on my tongue just reminiscing. Okay, agreed that was a little exaggeration, but the taste by no means is being exaggerated :)
Recently, at a get- together at my house, I made this and it was well received. So much so that the dish looked like it was licked clean. I like that! The recipe gives the mild version of the dish. Spike up the spice to your liking. I always make it less spicy, keeping my kids as well as the non-Indian guests in mind.
It's a wonderful party dish to the eyes as well as your taste buds.

Don't you think that Star Anise is one of the prettiest spices ever ?

Ingredients:
Baby potatoes- 1lbs
Oil- For deep frying
Oil- 2 Tbsp
Cumin seeds- 1 tsp
Asafoetida- a pinch
Whole Garam masala:
Cinnamon stick- 1 small piece
Star Anise- 2
Cloves- 3-4
Cardamom- 1 or 2
Tejpatta/Indian Bay leaves- 2
Finely chopped Onion- 1 cup
Ginger Garlic paste- 1 Tbsp
Tomato Puree- 1 1/2 Tbsp
Salt- To taste
For mixing in the yogurt:
Yogurt- 1 cup scant
Kashmiri Red Chilli Powder- 2 tsp
Red Chilli powder- 1/2 tsp
Fennel powder- 1 tsp
Coriander powder- 2 /14 tsp
Turmeric powder- a big pinch
Ginger juliennes- for garnishing
Method:
1.Peel and clean the potatoes.Prick them thoroughly with a fork and immerse them in salted water for n hour.
2.Drain them on a paper towel.
3.Heat oil in a deep frying pan and fry the potatoes till they turn golden brown.You have to do this on medium high heat, since if you keep the heat low, the potatoes will absorb more oil.
4.Heat oil in pan and splutter the cumin seeds.Add the asafoetida and keep stirring.Add the whole garam masala ans saute for a couple of minutes.
5.Throw in the finely chopped onions and saute till they turn brown.
6.Add the ginger garlic paste and saute till the raw smell leaves.
7.Add the tomato puree (I used the canned one)and saute till the oil startes to leave the sides.
8.Mix all the other spice powders in the yogurt and pour it into the pan.
9.Mix everything well and bring it to a boil.
10. Add the fried potatoes and mix well.Adjust the consistency with water.
11.Cover and cook on medium low heat for about 10 minutes.
12.If you want to have more gravy add more water while cooking.If you want it semi-dry or dry boil it accordingly.Remember that it will dry again even after switching off the heat.
13.Serve with poori/roti.
Contributor: Namitha
We finally put up some lights outside along the door and the railings as part of our Christmas decorations, and there is still more to do, but that will be for next weekend. How about you? Do tell me where you are with your decorations and cooking, etc. for the season.
Talking of festive food, today I am sharing a delicious preparation with potato which will have your guests drooling. The first time I had this a zillion years ago at a friends place for Diwali, I distinctly remember how everybody was raving about this dish. I sang my own tune of appreciation to her, and I can still feel the taste on my tongue just reminiscing. Okay, agreed that was a little exaggeration, but the taste by no means is being exaggerated :)
Recently, at a get- together at my house, I made this and it was well received. So much so that the dish looked like it was licked clean. I like that! The recipe gives the mild version of the dish. Spike up the spice to your liking. I always make it less spicy, keeping my kids as well as the non-Indian guests in mind.
It's a wonderful party dish to the eyes as well as your taste buds.
Don't you think that Star Anise is one of the prettiest spices ever ?
Ingredients:
Baby potatoes- 1lbs
Oil- For deep frying
Oil- 2 Tbsp
Cumin seeds- 1 tsp
Asafoetida- a pinch
Whole Garam masala:
Cinnamon stick- 1 small piece
Star Anise- 2
Cloves- 3-4
Cardamom- 1 or 2
Tejpatta/Indian Bay leaves- 2
Finely chopped Onion- 1 cup
Ginger Garlic paste- 1 Tbsp
Tomato Puree- 1 1/2 Tbsp
Salt- To taste
For mixing in the yogurt:
Yogurt- 1 cup scant
Kashmiri Red Chilli Powder- 2 tsp
Red Chilli powder- 1/2 tsp
Fennel powder- 1 tsp
Coriander powder- 2 /14 tsp
Turmeric powder- a big pinch
Ginger juliennes- for garnishing
Method:
1.Peel and clean the potatoes.Prick them thoroughly with a fork and immerse them in salted water for n hour.
2.Drain them on a paper towel.
3.Heat oil in a deep frying pan and fry the potatoes till they turn golden brown.You have to do this on medium high heat, since if you keep the heat low, the potatoes will absorb more oil.
4.Heat oil in pan and splutter the cumin seeds.Add the asafoetida and keep stirring.Add the whole garam masala ans saute for a couple of minutes.
5.Throw in the finely chopped onions and saute till they turn brown.
6.Add the ginger garlic paste and saute till the raw smell leaves.
7.Add the tomato puree (I used the canned one)and saute till the oil startes to leave the sides.
8.Mix all the other spice powders in the yogurt and pour it into the pan.
9.Mix everything well and bring it to a boil.
10. Add the fried potatoes and mix well.Adjust the consistency with water.
11.Cover and cook on medium low heat for about 10 minutes.
12.If you want to have more gravy add more water while cooking.If you want it semi-dry or dry boil it accordingly.Remember that it will dry again even after switching off the heat.
13.Serve with poori/roti.
Contributor: Namitha
Wednesday, December 1, 2010
Potato and Cauliflower
We have had a rainy spell these last few days, making my walk outside wet, wet,and just plain wet. It is also getting colder but no snows yet. I am waiting expectantly for the first showers of snow to fall, which is always fun, though hated soon after. Given the perfect weather to snuggle up on the couch, I am doing just that. Reading and talking on the phone occupies me. Cooking for survival is my mantra these days, and the following is one of those but quite worthy of a post.

I made this potato and cauliflower dish a while ago, and it tastes great with rotis ! This is a simple recipe with the only trial being it calls for slow cooking. You could microwave the potato and cauliflower and then mix it with the masala for an easier/faster option. But the slow cooking of the vegetables with the masala makes it so much tastier. If you can be patient for about 15 - 20 minutes to cook the taste will tell you it was well worth the wait.
Feel free to throw in more or less chilies and chili powder as per your taste. Most dishes I made tend to be on the spicier side, unless otherwise mentioned. Have fun with some 'chat patta' aaloo gobi.

Ingredients:
Potato - 1 big (Idaho Potato)
Cauliflower - 1/4 th
Onions - 1/2 or 1 medium size onion
Green Chilies - 2 nos
Chili Powder - 1/2 tspn or if you like it spicy hot go to 1 tspn
Coriander Powdcr - 1/2 tspn
Ginger garlic paste - 1 tspn
Turmeric - 1/2 tspn
Asafoetida - a pinch
Dry Mango Powder - sprinkle to give the dish a tang
Method:
1.Saute onions, green chilies and once onions are translucent add the ginger garlic paste
2. Saute further till the ginger garlic paste is cooked and express an aroma
3. Spoon in the powders and stir in briskly avoiding burning
4. Give it a minute and then add some water just a little like maybe 2 Tspn or if you are beginner go with 1/4 cup
5. Add the diced vegetables and cook on low fire until potato is cooked
Notes:
1. You could add the potatoes in first and cook for a while before you add the cauliflower if you like cauliflower crisp
2. The above method tends to cook the cauliflower a little too well that it falls apart.
Contributor: Sunitha
I made this potato and cauliflower dish a while ago, and it tastes great with rotis ! This is a simple recipe with the only trial being it calls for slow cooking. You could microwave the potato and cauliflower and then mix it with the masala for an easier/faster option. But the slow cooking of the vegetables with the masala makes it so much tastier. If you can be patient for about 15 - 20 minutes to cook the taste will tell you it was well worth the wait.
Feel free to throw in more or less chilies and chili powder as per your taste. Most dishes I made tend to be on the spicier side, unless otherwise mentioned. Have fun with some 'chat patta' aaloo gobi.
Ingredients:
Potato - 1 big (Idaho Potato)
Cauliflower - 1/4 th
Onions - 1/2 or 1 medium size onion
Green Chilies - 2 nos
Chili Powder - 1/2 tspn or if you like it spicy hot go to 1 tspn
Coriander Powdcr - 1/2 tspn
Ginger garlic paste - 1 tspn
Turmeric - 1/2 tspn
Asafoetida - a pinch
Dry Mango Powder - sprinkle to give the dish a tang
Method:
1.Saute onions, green chilies and once onions are translucent add the ginger garlic paste
2. Saute further till the ginger garlic paste is cooked and express an aroma
3. Spoon in the powders and stir in briskly avoiding burning
4. Give it a minute and then add some water just a little like maybe 2 Tspn or if you are beginner go with 1/4 cup
5. Add the diced vegetables and cook on low fire until potato is cooked
Notes:
1. You could add the potatoes in first and cook for a while before you add the cauliflower if you like cauliflower crisp
2. The above method tends to cook the cauliflower a little too well that it falls apart.
Contributor: Sunitha
Tuesday, October 19, 2010
Potato 'n' Spinach
The weekend was absolutely delightful with sunshine and the chance to be out in it. Cuyahoga National Park is about an hours drive for us so we made it there and had a jolly good time. Sandwiches on the park bench and lots of walking. I wonder why in spite of all the walking my weight persists. I suppose it is the growing figure I encounter in my mirror daily that prodded me to make something a little healthier today. Potato is starch, I agree, but when I see the green spinach on my plate it make me feel like I am eating healthy food.

Hoping you will enjoy a good dose of greens yourself here is how to make Aaloo Palak (Potato and Spinach)

Ingredients:
Idaho Potato - 1 big (I know they are always big but either ways 'big')
Spinach - 1 Bunch
Oil - 1 Tbspn
Cumin Seed - 1/2 Tspn
Mustard Seed - 1/2 Tspn
Onion - 1 small (chopped fine)
Green Chilis - 2
Garlic - 2 pods
Chili Powder - 1 Tspn
Turmeric - 1/2 Tspn
Aamchur - 1/2 Tspn
Garam Masala - 1/2 Tspn
Lime Juice - 1 Tspn (optional)
Method:
1. Cut potatoes into big pieces, cook, drain and set aside
2. Heat oil in a pan, splutter mustard and cumin
3. Add onions, green chilies and garlic and saute till onions are translucent
4. Add turmeric, chili powder, aamchur and garam masala and saute
5. When oil express add the spinach mix well and cook on low fire until the leaves have wilted and softened. It will cook down to almost half it's volume
6. Add the cooked potato stir well sqeeze the lime juice if you like and serve
Notes: Serve with rotis or rice
Hoping you will enjoy a good dose of greens yourself here is how to make Aaloo Palak (Potato and Spinach)
Ingredients:
Idaho Potato - 1 big (I know they are always big but either ways 'big')
Spinach - 1 Bunch
Oil - 1 Tbspn
Cumin Seed - 1/2 Tspn
Mustard Seed - 1/2 Tspn
Onion - 1 small (chopped fine)
Green Chilis - 2
Garlic - 2 pods
Chili Powder - 1 Tspn
Turmeric - 1/2 Tspn
Aamchur - 1/2 Tspn
Garam Masala - 1/2 Tspn
Lime Juice - 1 Tspn (optional)
Method:
1. Cut potatoes into big pieces, cook, drain and set aside
2. Heat oil in a pan, splutter mustard and cumin
3. Add onions, green chilies and garlic and saute till onions are translucent
4. Add turmeric, chili powder, aamchur and garam masala and saute
5. When oil express add the spinach mix well and cook on low fire until the leaves have wilted and softened. It will cook down to almost half it's volume
6. Add the cooked potato stir well sqeeze the lime juice if you like and serve
Notes: Serve with rotis or rice
Labels:
Gluten-free,
Potato,
Spinach,
Vegetarian Side Dish
Friday, October 1, 2010
Navratan Korma/Navaratna Kurma/Mixture of vegetables in a creamy tangy sauce
Quite the North Indian dish this is, yet, another one that has made its way to the hearts of us Southerners. My daughter so loved it she was glad to eat leftovers too.

It's quite a favorite with me because I can make one dish, and be sure it's packed with multivitamins. Oh! well, That's what I would like to think, all healthy and all. But honestly, we are more of a eat good food and well, then if it's too much walk it off kind of people. Then why I like it really is because each spoon of the dish carries a mystery. Let me explain! Until I bite into a vegetable, since there are so many in it, how am I to know what I've got?! See the mystery? I don't know about you ,but I think it is like unraveling a surprise gift and who does not like mysteries and surprise gifts, now!?

I do like to make every cooking and eating experience fun and this one has been tremendous.
Ingredients:
Boiled veggies- 5 cups ( I took Bell pepper,Cauliflower, Cabbage, Carrot, French beans, Green peas and Potato)
Tomatoes- 3(blanched and pureed)
Oil- 3 to 4 Tbsp
Onions, finely chopped- 1 cup
Ginger Garlic Paste- 1 Tbsp
Garam masala- 2 tsp
Kashmiri chilli powder-3 tsp
Red Chilli powder- 1/2 tsp
Coriander powder- 2 tsp
Milk- 1 1/2cup
Heavy Cream- 1/4 cup(optional)
Cashews- 2 tbsp
Raisins- 2 tbsp
Ghee- 1 tbsp
Method:
1.Cut the vegetables into cubes and steam them to cook.I usually begin with the veggies that take long time to cook( in this recipe, Potatoes) and keep adding the rest one by one.
2.Blanch the tomatoes by keeping them in boiling water for a couple of minutes and washing immediately with cold water. Remove the skin and puree them.
3.Heat oil in a non stick pan and saute the onion till it turns golden brown.
4.Add the ginger garlic paste into this and saute till the raw smell leaves.
5.Mix in all the spices and saute for a couple of minutes.
6.Pour the tomato puree into this and cook till the oil starts leaving the sides.
7.Pour the milk into this and mix well.This is the time to add any cream if you are using.
8.Heat this mixture till it starts boiling.In another pan fry the cashews and raisins in ghee.Add this to the gravy.
9.Throw in the cooked veggies and cook for 5-6 minutes, or till the gravy gets thickened.Keep in your mind that the gravy gets thicker once it cools down.
10.Serve with roti or nan after garnishing with cream or coriander leaves.

Notes:
1.You could add just water instead of milk, but then the gravy won't be that creamy.
2.Heavy cream is optional.
3.You could choose the veggies of your choice.
4.This serves about 12-15 people.(I made this for a party!)
5.I made this keeping the kids in mind, so the gravy is on milder side.
6.You could replace one tomato with a tablespoon of tomato puree, if you would like to have a brighter color.
Contributor: Namitha
It's quite a favorite with me because I can make one dish, and be sure it's packed with multivitamins. Oh! well, That's what I would like to think, all healthy and all. But honestly, we are more of a eat good food and well, then if it's too much walk it off kind of people. Then why I like it really is because each spoon of the dish carries a mystery. Let me explain! Until I bite into a vegetable, since there are so many in it, how am I to know what I've got?! See the mystery? I don't know about you ,but I think it is like unraveling a surprise gift and who does not like mysteries and surprise gifts, now!?
I do like to make every cooking and eating experience fun and this one has been tremendous.
Ingredients:
Boiled veggies- 5 cups ( I took Bell pepper,Cauliflower, Cabbage, Carrot, French beans, Green peas and Potato)
Tomatoes- 3(blanched and pureed)
Oil- 3 to 4 Tbsp
Onions, finely chopped- 1 cup
Ginger Garlic Paste- 1 Tbsp
Garam masala- 2 tsp
Kashmiri chilli powder-3 tsp
Red Chilli powder- 1/2 tsp
Coriander powder- 2 tsp
Milk- 1 1/2cup
Heavy Cream- 1/4 cup(optional)
Cashews- 2 tbsp
Raisins- 2 tbsp
Ghee- 1 tbsp
Method:
1.Cut the vegetables into cubes and steam them to cook.I usually begin with the veggies that take long time to cook( in this recipe, Potatoes) and keep adding the rest one by one.
2.Blanch the tomatoes by keeping them in boiling water for a couple of minutes and washing immediately with cold water. Remove the skin and puree them.
3.Heat oil in a non stick pan and saute the onion till it turns golden brown.
4.Add the ginger garlic paste into this and saute till the raw smell leaves.
5.Mix in all the spices and saute for a couple of minutes.
6.Pour the tomato puree into this and cook till the oil starts leaving the sides.
7.Pour the milk into this and mix well.This is the time to add any cream if you are using.
8.Heat this mixture till it starts boiling.In another pan fry the cashews and raisins in ghee.Add this to the gravy.
9.Throw in the cooked veggies and cook for 5-6 minutes, or till the gravy gets thickened.Keep in your mind that the gravy gets thicker once it cools down.
10.Serve with roti or nan after garnishing with cream or coriander leaves.
Notes:
1.You could add just water instead of milk, but then the gravy won't be that creamy.
2.Heavy cream is optional.
3.You could choose the veggies of your choice.
4.This serves about 12-15 people.(I made this for a party!)
5.I made this keeping the kids in mind, so the gravy is on milder side.
6.You could replace one tomato with a tablespoon of tomato puree, if you would like to have a brighter color.
Contributor: Namitha
Thursday, September 23, 2010
Bharwan Bhindi/ Stuffed Okra
Bhindi / Okra stuffed gets cleaned off plates easily, around here. The stuffed okra recipe is simple, but time consuming because it's cooked on low heat. You can use store-bought masala to stuff the okra or home-made. Since I seldom buy store bought masala, I have something you can put together at home with out a branded sambar or chana masala powder.

The key to making this dish is to make sure the stuffing is well cooked. Since the okra tends to brown easily it's challenging, however, cooking on low heat helps.

Look who was visiting this morning! He is always around, digging holes in my planters.

Ingredients:
Okra - 30 nos washed and dried; the head chopped off
Onions - 1
Tomato - 1
Cummin - 1/2 tspn
Coriander Powder - 1 Tbspn
Chili Powder - 1 Tbspn (if you want it milder use less)
Asafoetida - 1/8th tspn
Fenugreek Powder - 1/4 tspn
Turmeric - 1/2 tspn
Besan (Chickpea flour) - 1 tspn
Aamchoor/ (Dry Mango Powder) - 1/2 tspn
Oil - 1 Tbspn
Method:
1. Dry toast all the powders on low heat and with little water make a paste
2. Slit the okra on one side and stuff the masala
4. Heat the pan and add 1 Tbspn oil
5. Arrange the okra with the open-stuffed side facing up
6. Keep the heat at the lowest and cook the okra covered for 10 minutes checking in between to make sure the bottom is not burning
7. Gently toss without displacing the masala or turning the okra fully for another 5 minutes or so
8. The color should change from the bright green of the vegetable to a more cooked dull green
9. Turn around all the orka now and cook again for 5 minutes toss a little and continue cooking
10. Make sure the masala does not burn
11. Once the okra is cooked, add onions and fry for a few minutes followed by tomato like I have done today or if you want the onions and tomatoes to be crispy
12. Take the okra out, heat 1/2 tbspn oil and add cummin seeds and splutter followed by onions and stir fry on high for a minute
13. Add chopped tomatoes and fry on high to brown the edges but keeping the shape
14. Toss this over the fried stuff okra and squeeze about 1/4 of a lemon and serve
Notes: You can serve this dish with roti's or rice.
2. I added the cumin seeds with the powder and finished off with step 11 when I cooked today.
The key to making this dish is to make sure the stuffing is well cooked. Since the okra tends to brown easily it's challenging, however, cooking on low heat helps.
Look who was visiting this morning! He is always around, digging holes in my planters.
Ingredients:
Okra - 30 nos washed and dried; the head chopped off
Onions - 1
Tomato - 1
Cummin - 1/2 tspn
Coriander Powder - 1 Tbspn
Chili Powder - 1 Tbspn (if you want it milder use less)
Asafoetida - 1/8th tspn
Fenugreek Powder - 1/4 tspn
Turmeric - 1/2 tspn
Besan (Chickpea flour) - 1 tspn
Aamchoor/ (Dry Mango Powder) - 1/2 tspn
Oil - 1 Tbspn
Method:
1. Dry toast all the powders on low heat and with little water make a paste
2. Slit the okra on one side and stuff the masala
4. Heat the pan and add 1 Tbspn oil
5. Arrange the okra with the open-stuffed side facing up
6. Keep the heat at the lowest and cook the okra covered for 10 minutes checking in between to make sure the bottom is not burning
7. Gently toss without displacing the masala or turning the okra fully for another 5 minutes or so
8. The color should change from the bright green of the vegetable to a more cooked dull green
9. Turn around all the orka now and cook again for 5 minutes toss a little and continue cooking
10. Make sure the masala does not burn
11. Once the okra is cooked, add onions and fry for a few minutes followed by tomato like I have done today or if you want the onions and tomatoes to be crispy
12. Take the okra out, heat 1/2 tbspn oil and add cummin seeds and splutter followed by onions and stir fry on high for a minute
13. Add chopped tomatoes and fry on high to brown the edges but keeping the shape
14. Toss this over the fried stuff okra and squeeze about 1/4 of a lemon and serve
Notes: You can serve this dish with roti's or rice.
2. I added the cumin seeds with the powder and finished off with step 11 when I cooked today.
Sunday, August 22, 2010
Thaalu Thoran/Taro Stem Sauteed with coconut and spices
Thaalu thoran is made out of Colocasia stem. Have you heard of this one before? I am asking because my friend from Kottayam (my home town) says she has never had this before. You should, if you haven't. The thaalu and deep friend rice grains together gives this thoran a nice crunchy texture. I hope I could explain the taste better.
Everyone at home know how much I like this one. Not so easily available in the US my sweetest granny made sure I had enough. She made up for all the missed times. Oh! she is quite old now and she spoils me.
Back to the recipe. It is quite simple. Though rare you can buy the stems in Chinese super markets in the US. Exorbitantly priced when the urge hits I indulge. This used to happen especially when I was carrying my son. Now, you will agree those are times when you can just let go. I have to say this in closing you need no excuses to spend on this one. Once you taste it I guarantee you will go back for more thaalu.

Ingredients:
Stem of colocasia/Taro/thaalu- 4
Cocnut grated- 1/3 cup
Green Chillies- 2-3
Turmeric powder- a pinch
Salt
For seasoning:
Raw rice- 3 Tbsp
Mustard seeds- 1/4 tsp
Coconut oil/Any cooking oil- 1 Tbsp
Shallots- 2-3,chopped finely
Curry leaves- 1 sprig
Dried red chillies- 2

Method:
1.Chop the stem finely into slender pieces.Sprinkle a few tablespoons of water and salt over it and squeeze out this completely to remove the juices from the stem that cause itching.This also keeps the thoran dry and crisp rather than mushy.(You could apply some cooking oil on both your palms,or wear some disposable gloves so that it will not make you itchy !)
2.Heat the oil in a pan and do the seasoning starting with mustard seeds.Once they splutter add the rice into it and let it brown slightly. Trow in the shallots and red chillies and saute for a couple of minutes or until the shallots turn brown.Now saute the curry leaves too
3.Meanwhile grind the coconut and green chillies coarsely.
4.Throw in the chopped stem and coconut mixture along with turmeric and salt into the seasoning and cover to cook on low heat. Stir every 2-3 minutes until it is cooked. This won't take more than 5-6 minutes.
5.Keep the pan open and let all the moisture get absorbed.Serve warm with pulissery or sambar .

These pictures of Taro is from my father's vegetable garden.As a child (and also now) I love to see the water droplets on a taro leaf :-)
Contributor: Namitha
Everyone at home know how much I like this one. Not so easily available in the US my sweetest granny made sure I had enough. She made up for all the missed times. Oh! she is quite old now and she spoils me.
Back to the recipe. It is quite simple. Though rare you can buy the stems in Chinese super markets in the US. Exorbitantly priced when the urge hits I indulge. This used to happen especially when I was carrying my son. Now, you will agree those are times when you can just let go. I have to say this in closing you need no excuses to spend on this one. Once you taste it I guarantee you will go back for more thaalu.
Ingredients:
Stem of colocasia/Taro/thaalu- 4
Cocnut grated- 1/3 cup
Green Chillies- 2-3
Turmeric powder- a pinch
Salt
For seasoning:
Raw rice- 3 Tbsp
Mustard seeds- 1/4 tsp
Coconut oil/Any cooking oil- 1 Tbsp
Shallots- 2-3,chopped finely
Curry leaves- 1 sprig
Dried red chillies- 2
Method:
1.Chop the stem finely into slender pieces.Sprinkle a few tablespoons of water and salt over it and squeeze out this completely to remove the juices from the stem that cause itching.This also keeps the thoran dry and crisp rather than mushy.(You could apply some cooking oil on both your palms,or wear some disposable gloves so that it will not make you itchy !)
2.Heat the oil in a pan and do the seasoning starting with mustard seeds.Once they splutter add the rice into it and let it brown slightly. Trow in the shallots and red chillies and saute for a couple of minutes or until the shallots turn brown.Now saute the curry leaves too
3.Meanwhile grind the coconut and green chillies coarsely.
4.Throw in the chopped stem and coconut mixture along with turmeric and salt into the seasoning and cover to cook on low heat. Stir every 2-3 minutes until it is cooked. This won't take more than 5-6 minutes.
5.Keep the pan open and let all the moisture get absorbed.Serve warm with pulissery or sambar .
These pictures of Taro is from my father's vegetable garden.As a child (and also now) I love to see the water droplets on a taro leaf :-)
Contributor: Namitha
Labels:
Authentic,
Coconut,
Colocasia,
Gluten-free,
Grandma's,
Kerala Dishes,
Naadan,
Taro Stem,
Vegetarian Side Dish
Subscribe to:
Posts (Atom)